Race 3 - Australia 2024
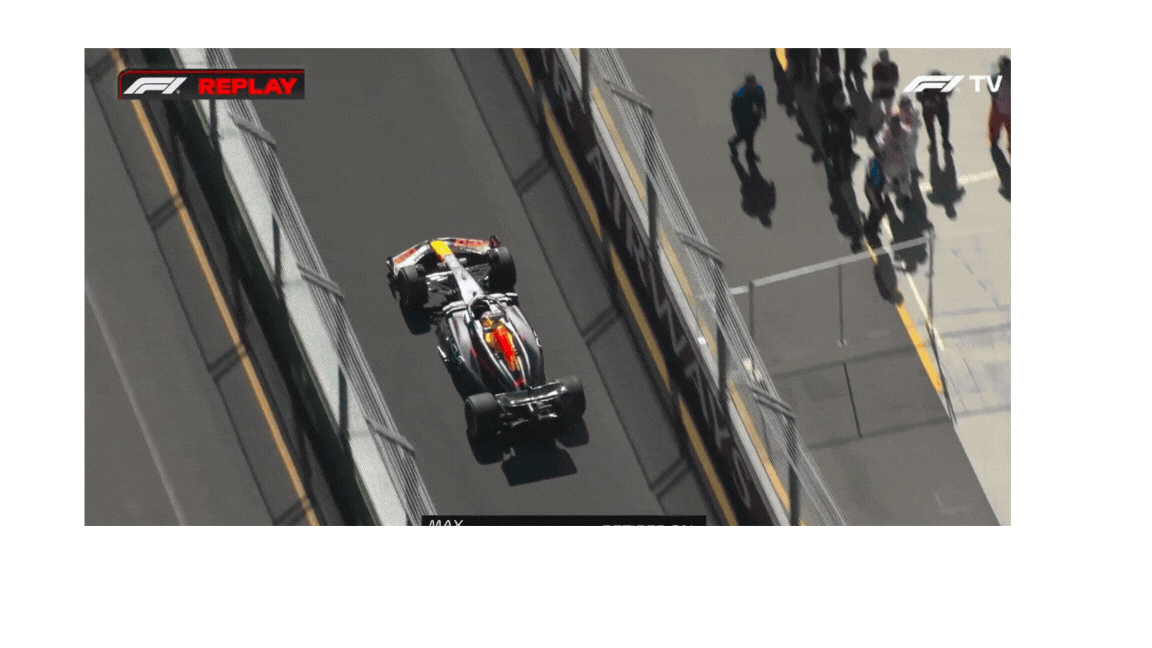
Carlos Sainz, returning after missing Saudi Arabia due to appendicitis surgery and facing an uncertain future without a 2025 contract, delivered a statement performance in Melbourne. With Max Verstappen retiring from the race after car issues, Carlos seized the opportunity and drove like his career depended on it. Mercedes on the other hand suffered a double DNF, with Russell crashing the car on lap 57 and Lewis retiring from a car issue.
Battle of Team Mates: Sainz Vs Leclerc
On lap 2, Carlos overtook Max, asserting himself early. Before his first pit stop on lap 16, he consistently delivered personal bests in sectors 1 and 3, while Charles Leclerc maintained control in sector 2.
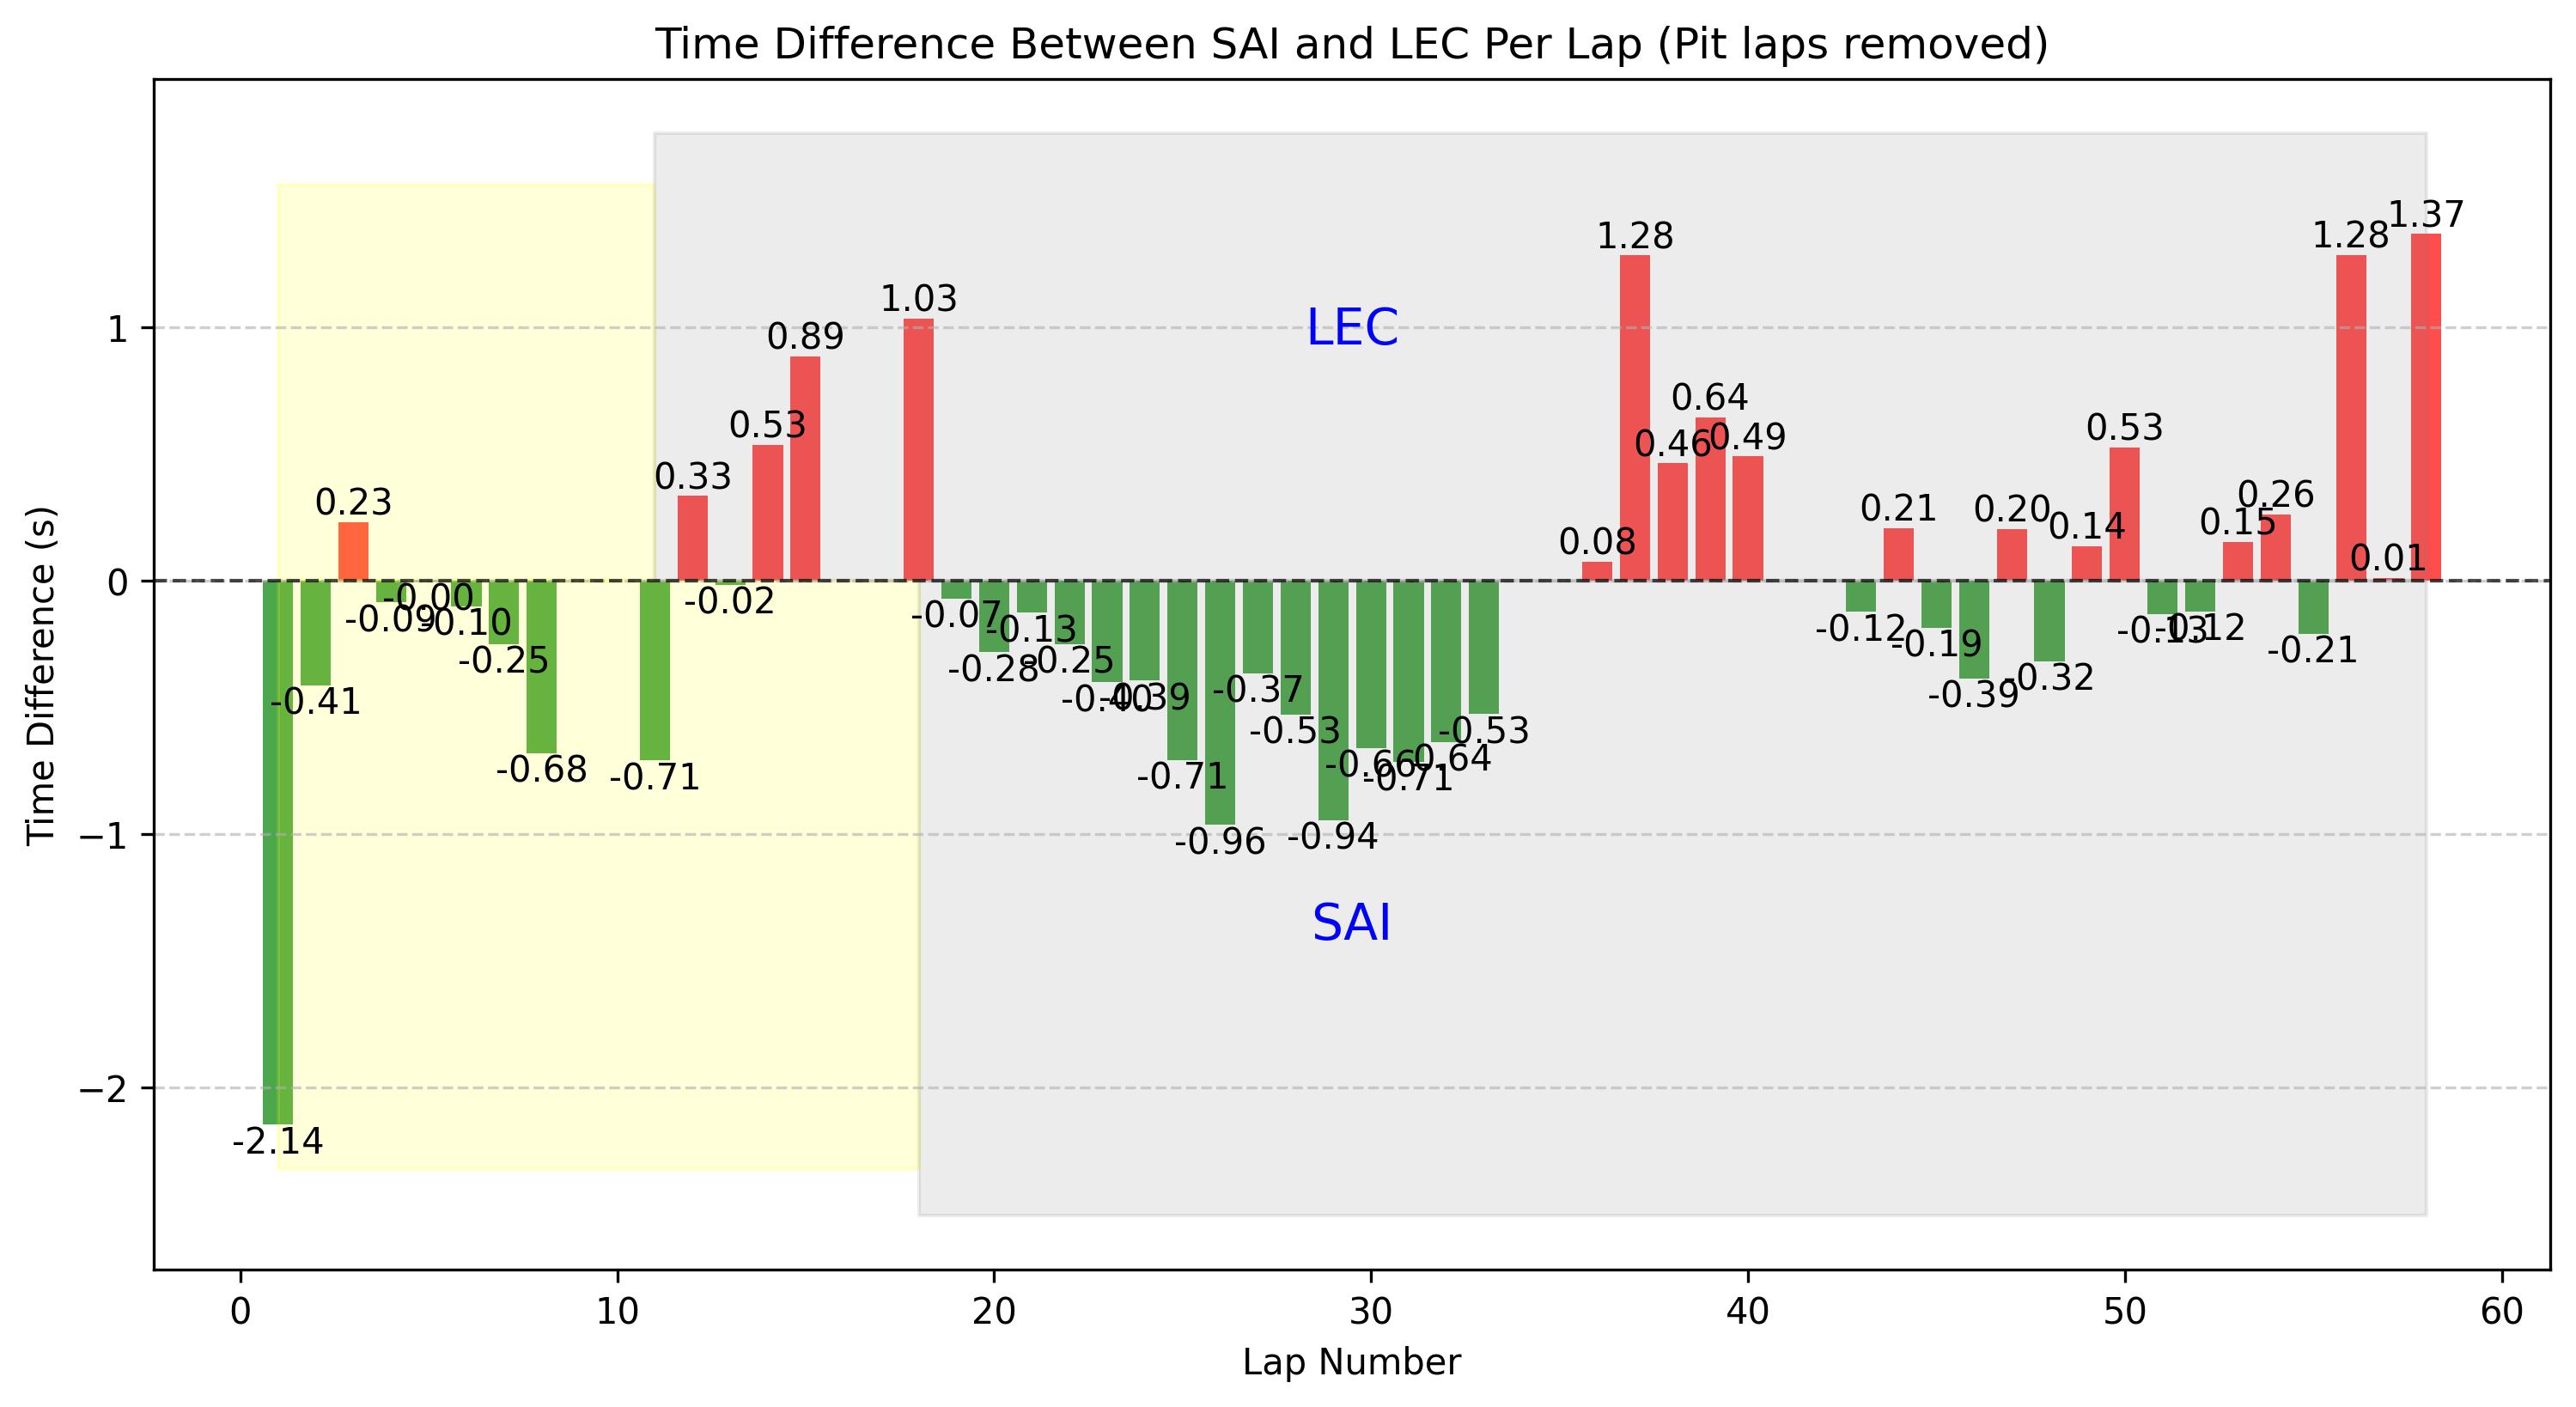 Time differences between Carlos and Charles by lap (pit laps removed)
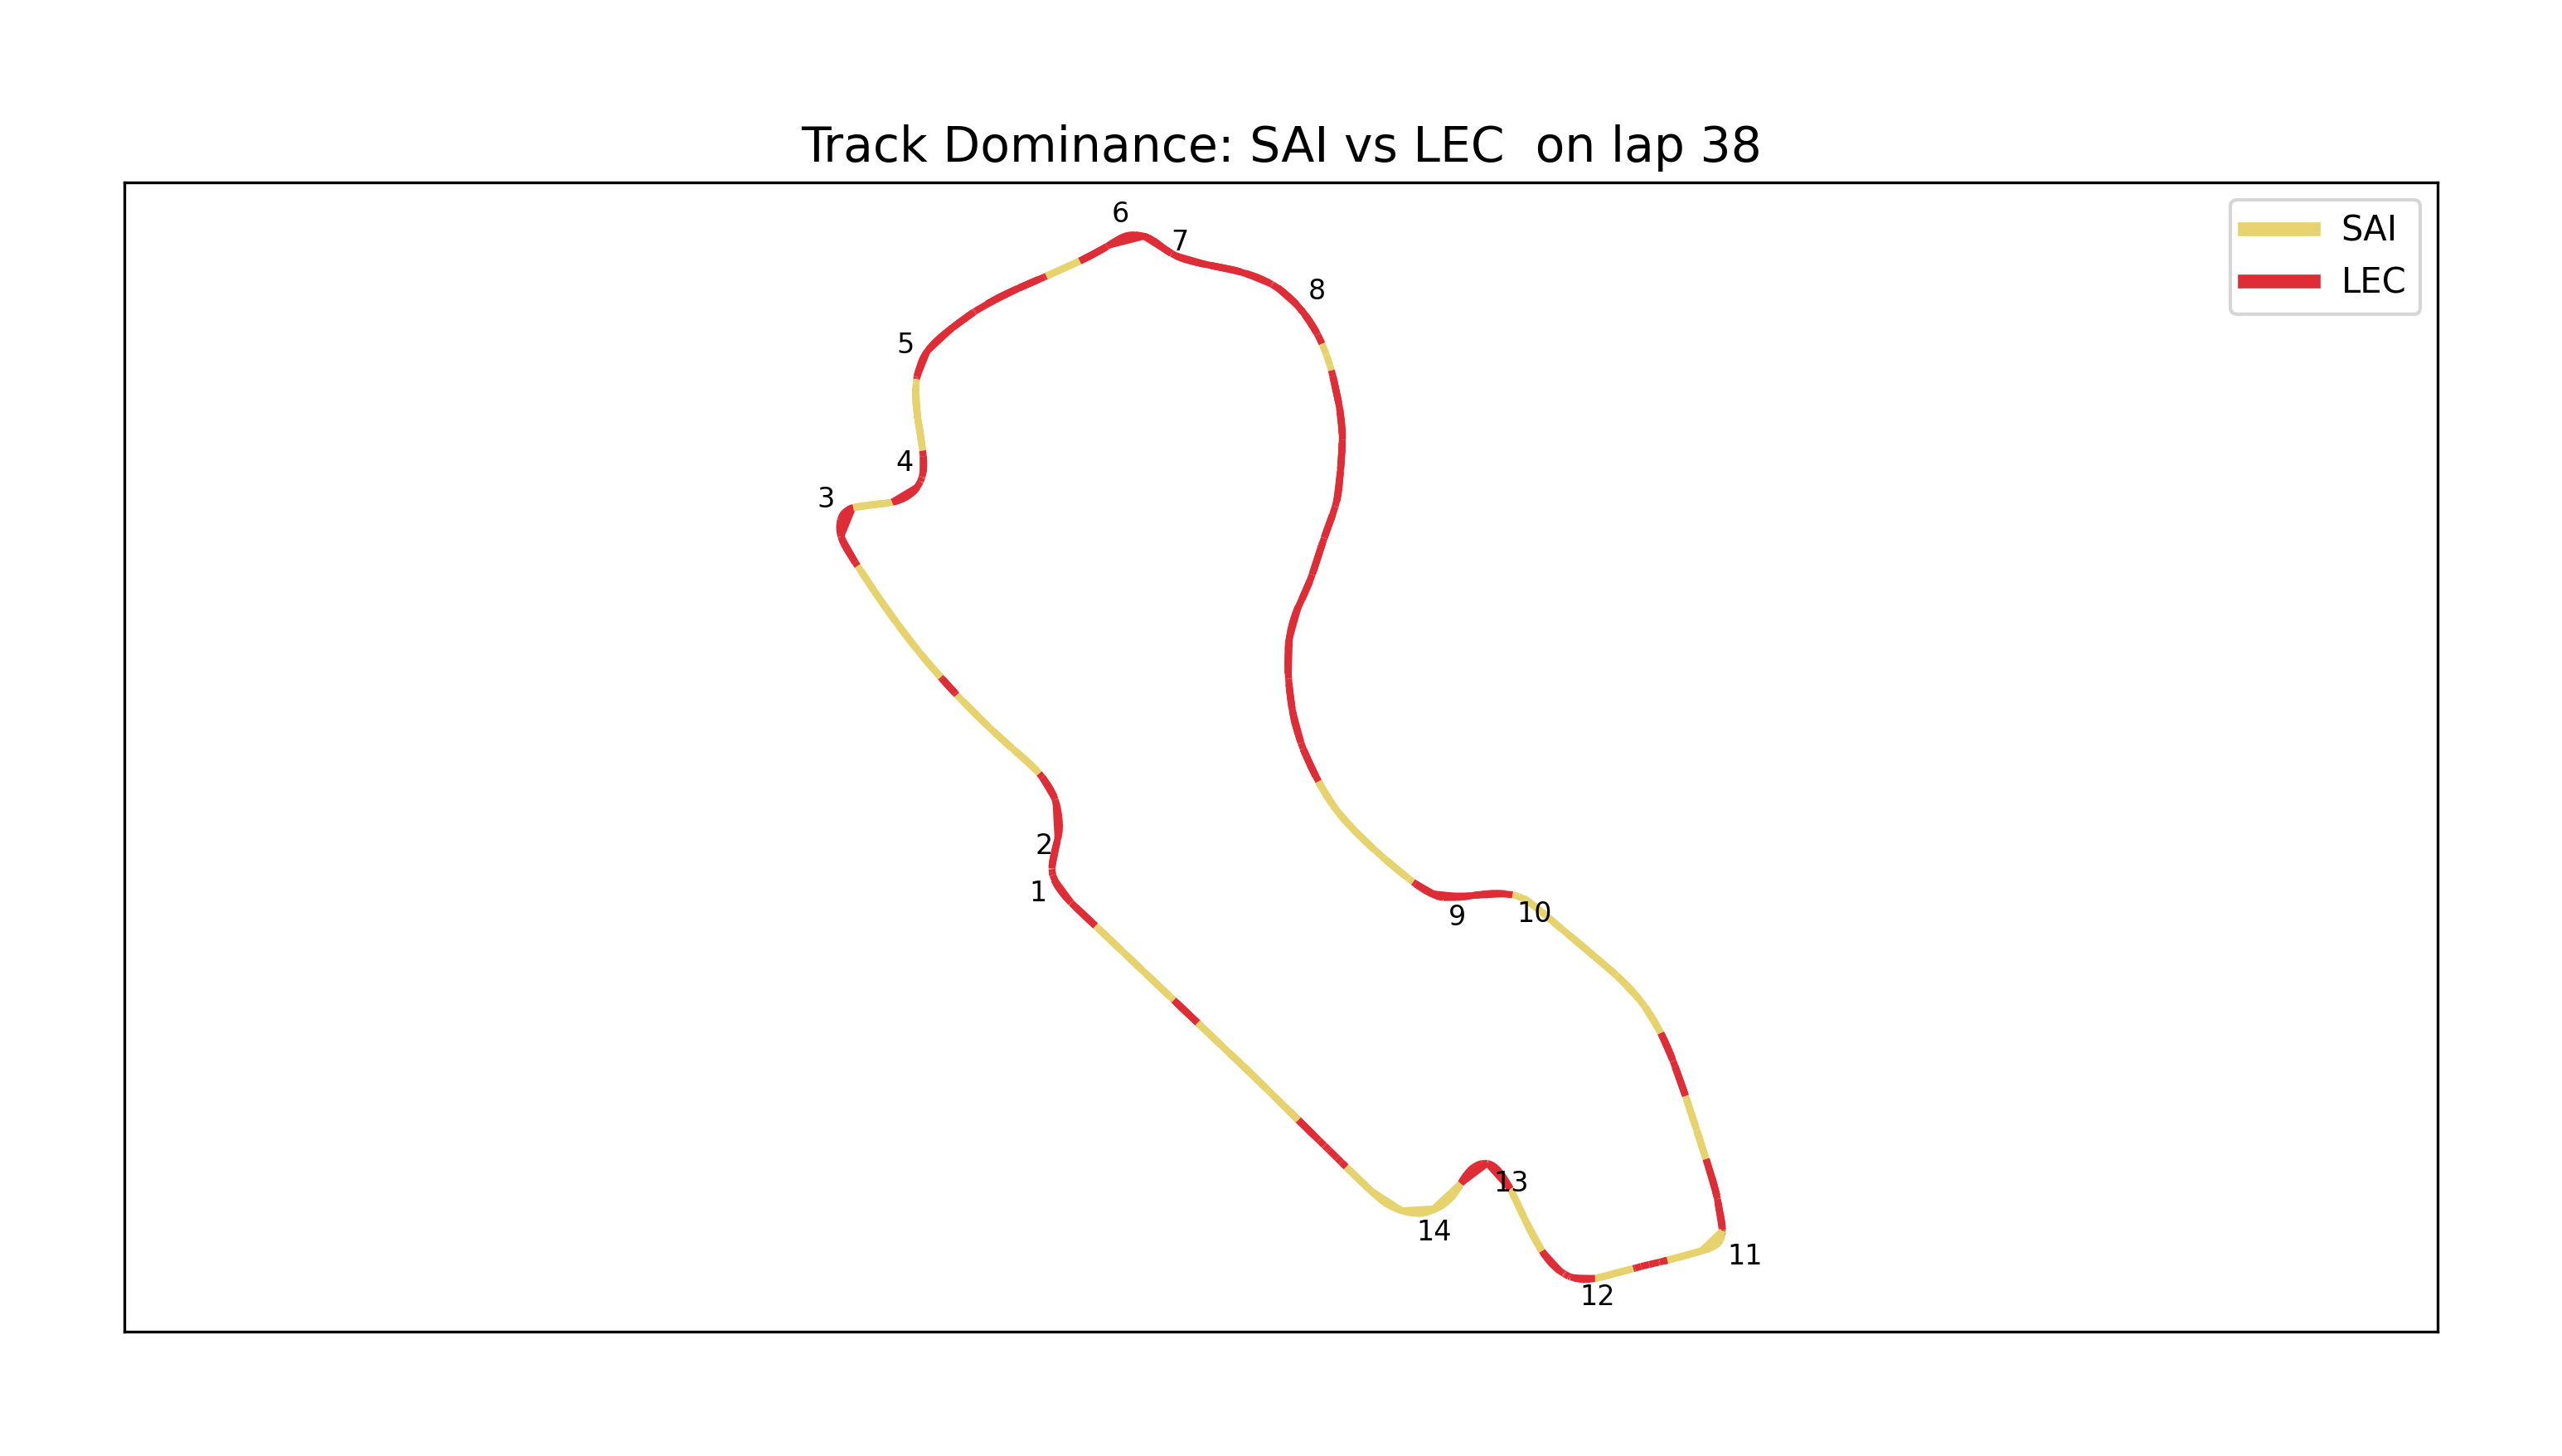
However, after Carlos switched to a fresh set of hard tires, Leclerc’s dominance in sector 2 faded. From laps 17 to 34, Carlos extended the gap by maximizing performance in the faster sections of the track. His team radio highlighted his confidence, as he continued to clock competitive lap times and maintain a strong rhythm. Charles pitted on lap 34, bolting on another set of hards, and immediately began pushing to close the gap. By the time Carlos made his second pit stop, he had built a comfortable 6-second lead. Despite Leclerc’s efforts to claw the gap back to 3.5 seconds, Russell’s crash at turn 6 on lap 58 brought out a Virtual Safety Car (VSC), effectively neutralizing the fight to the finish.
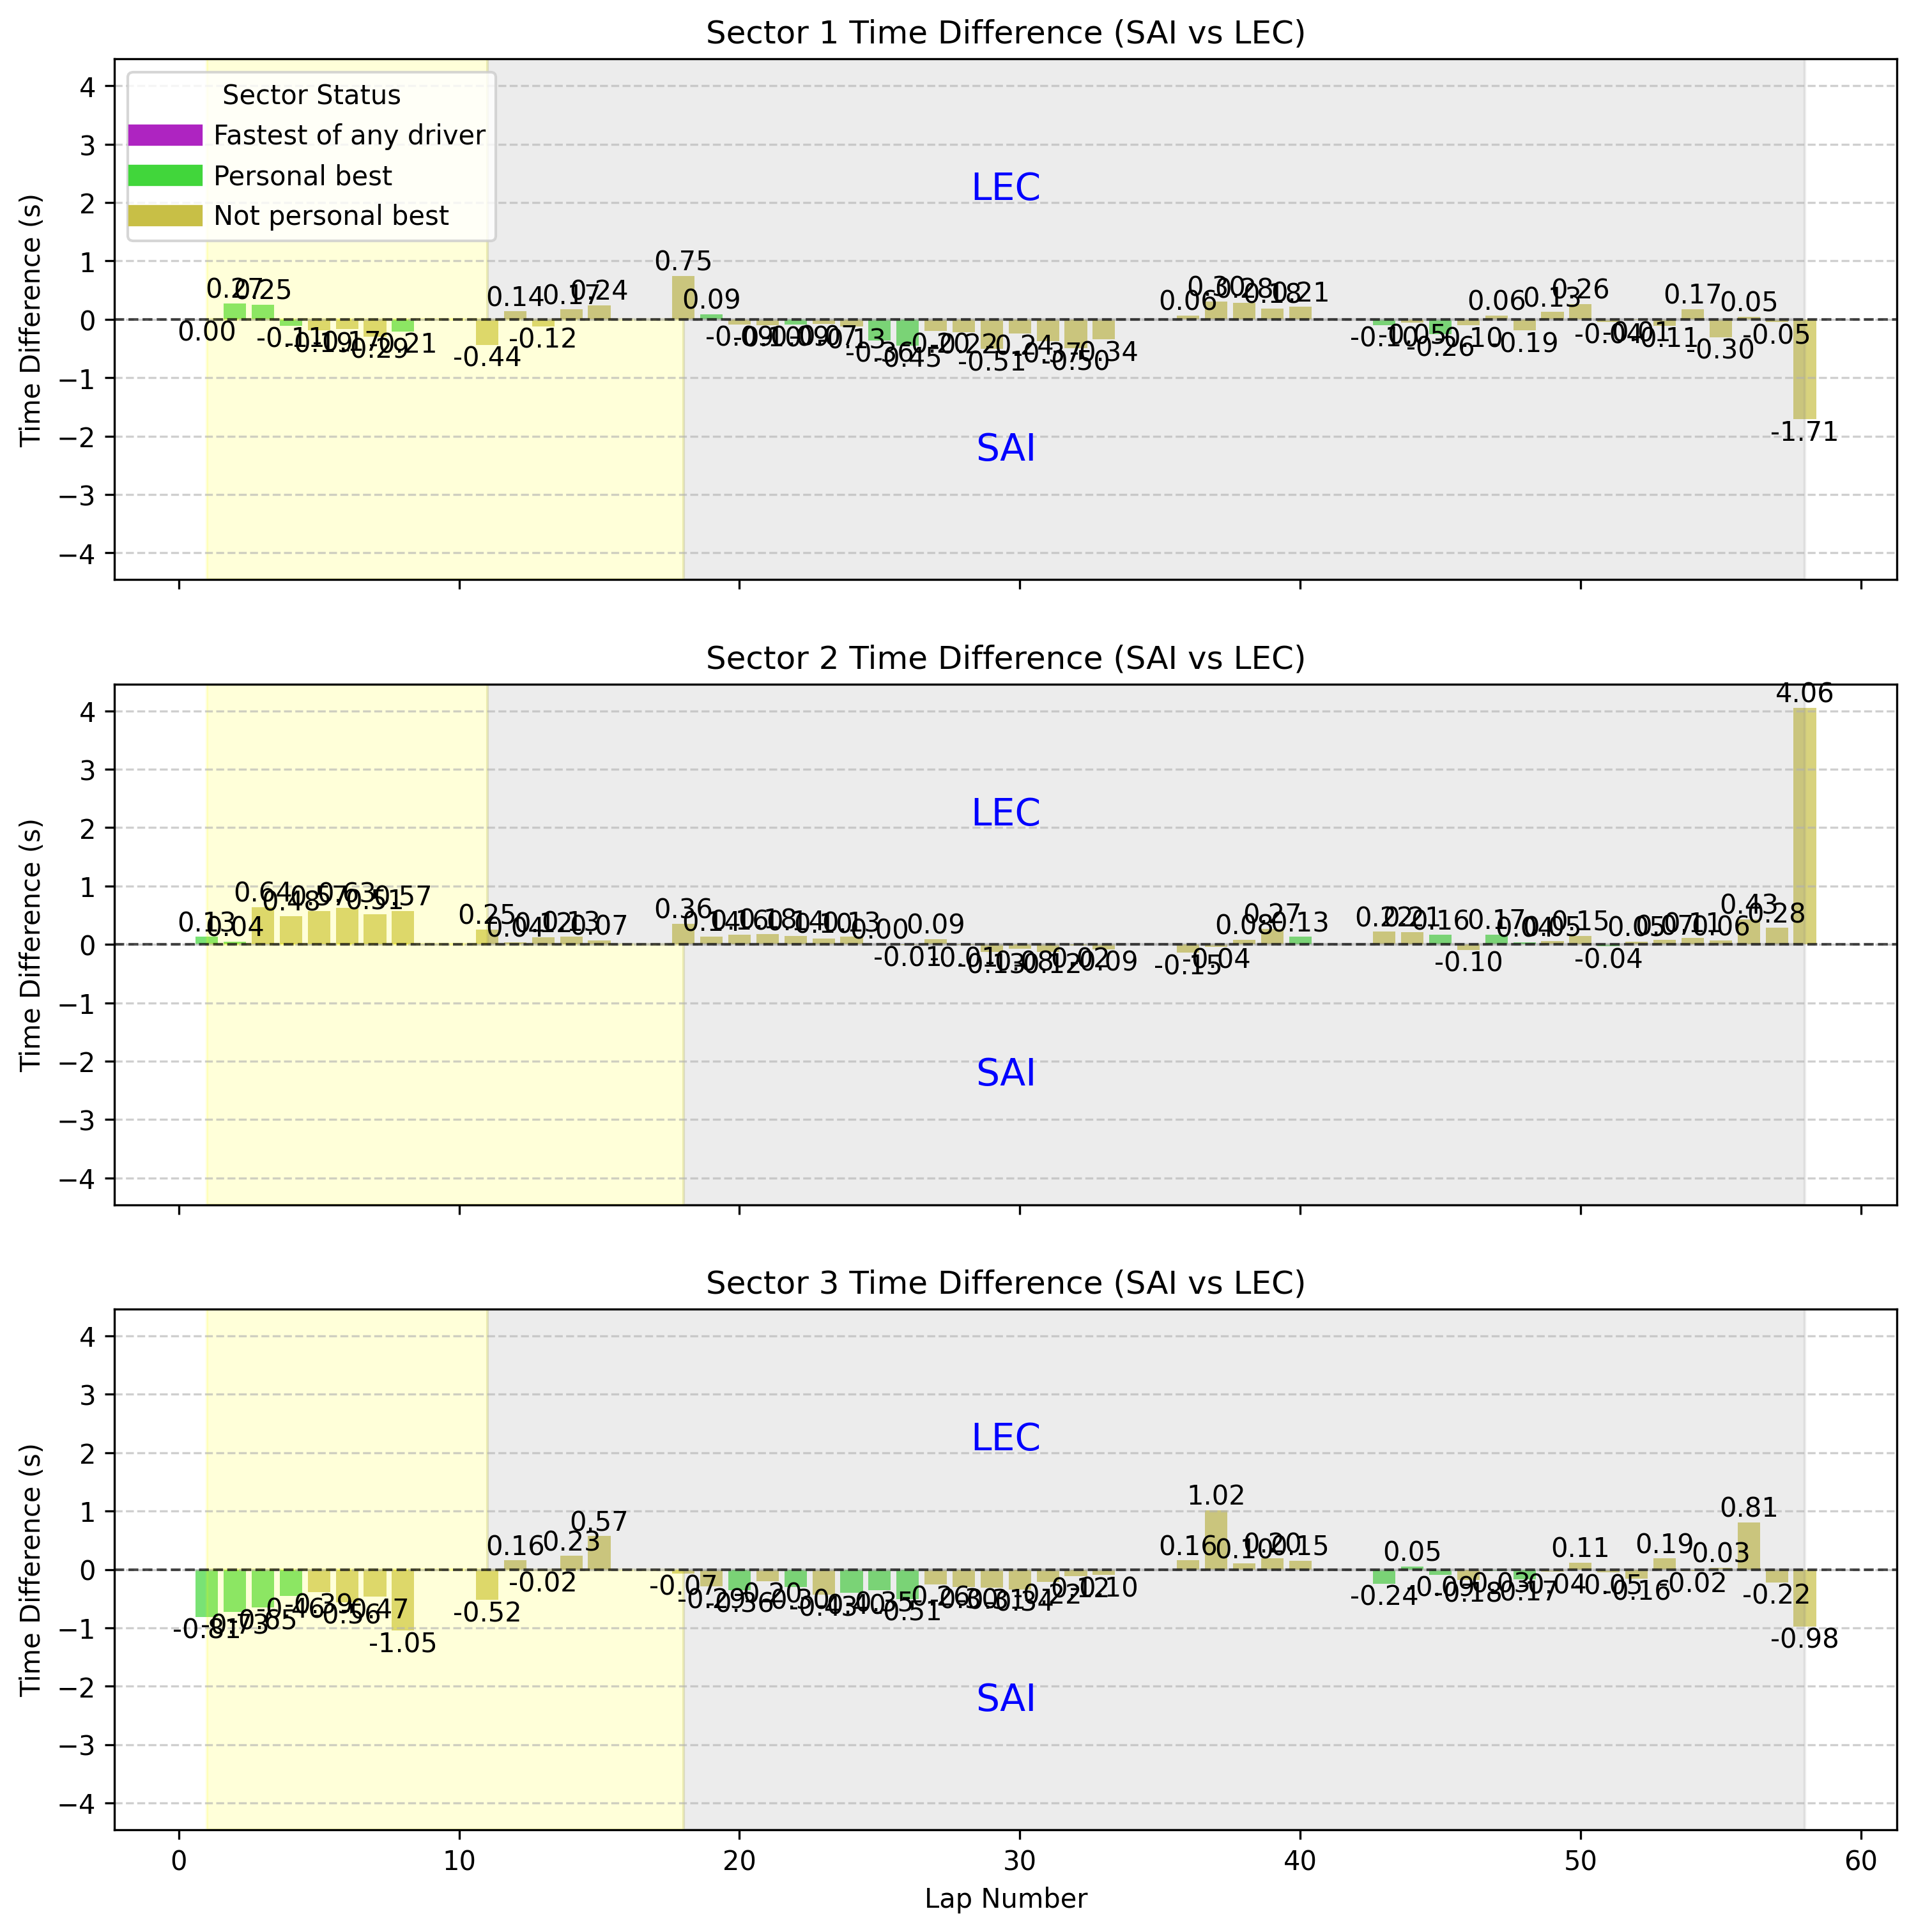
Sector Analysis
- Sector 1: Carlos showed impressive control through the medium-speed sequences, often gaining a tenth or two over Charles.
- Sector 2: Initially a stronghold for Charles, his performance dipped post-pit stop. Track evolution and car set up may have impacted his grip levels here.
- Sector 3: Carlos consistently gained time throughout the race, proving himself to be good in slow speed corners.
Former Arch Rival: Russell Vs Perez
With Max Verstappen bowing out due to technical issues, Sergio Perez was Red Bull’s sole hope in Australia. This presented Perez with a golden opportunity to recover points and close the gap to his dominant teammate. However, his race didn’t begin smoothly—he lost a position to George Russell off the start and had to fight his way back up the field.
Lap 2: DRS Comes into Play
By lap 2, Perez was hot on Russell’s tail, staying within DRS range. The Red Bull’s superior pace in sector 2, where high-speed corners reign supreme, became evident as Perez relentlessly pressured the Mercedes through every turn.
Despite Perez’s pace advantage in the high-speed sections, Russell put on a defensive masterclass, making it difficult for Perez to overtake. It wasn’t until Russell pitted that Perez finally got the clean air he needed to begin closing in on Oscar Piastri ahead.
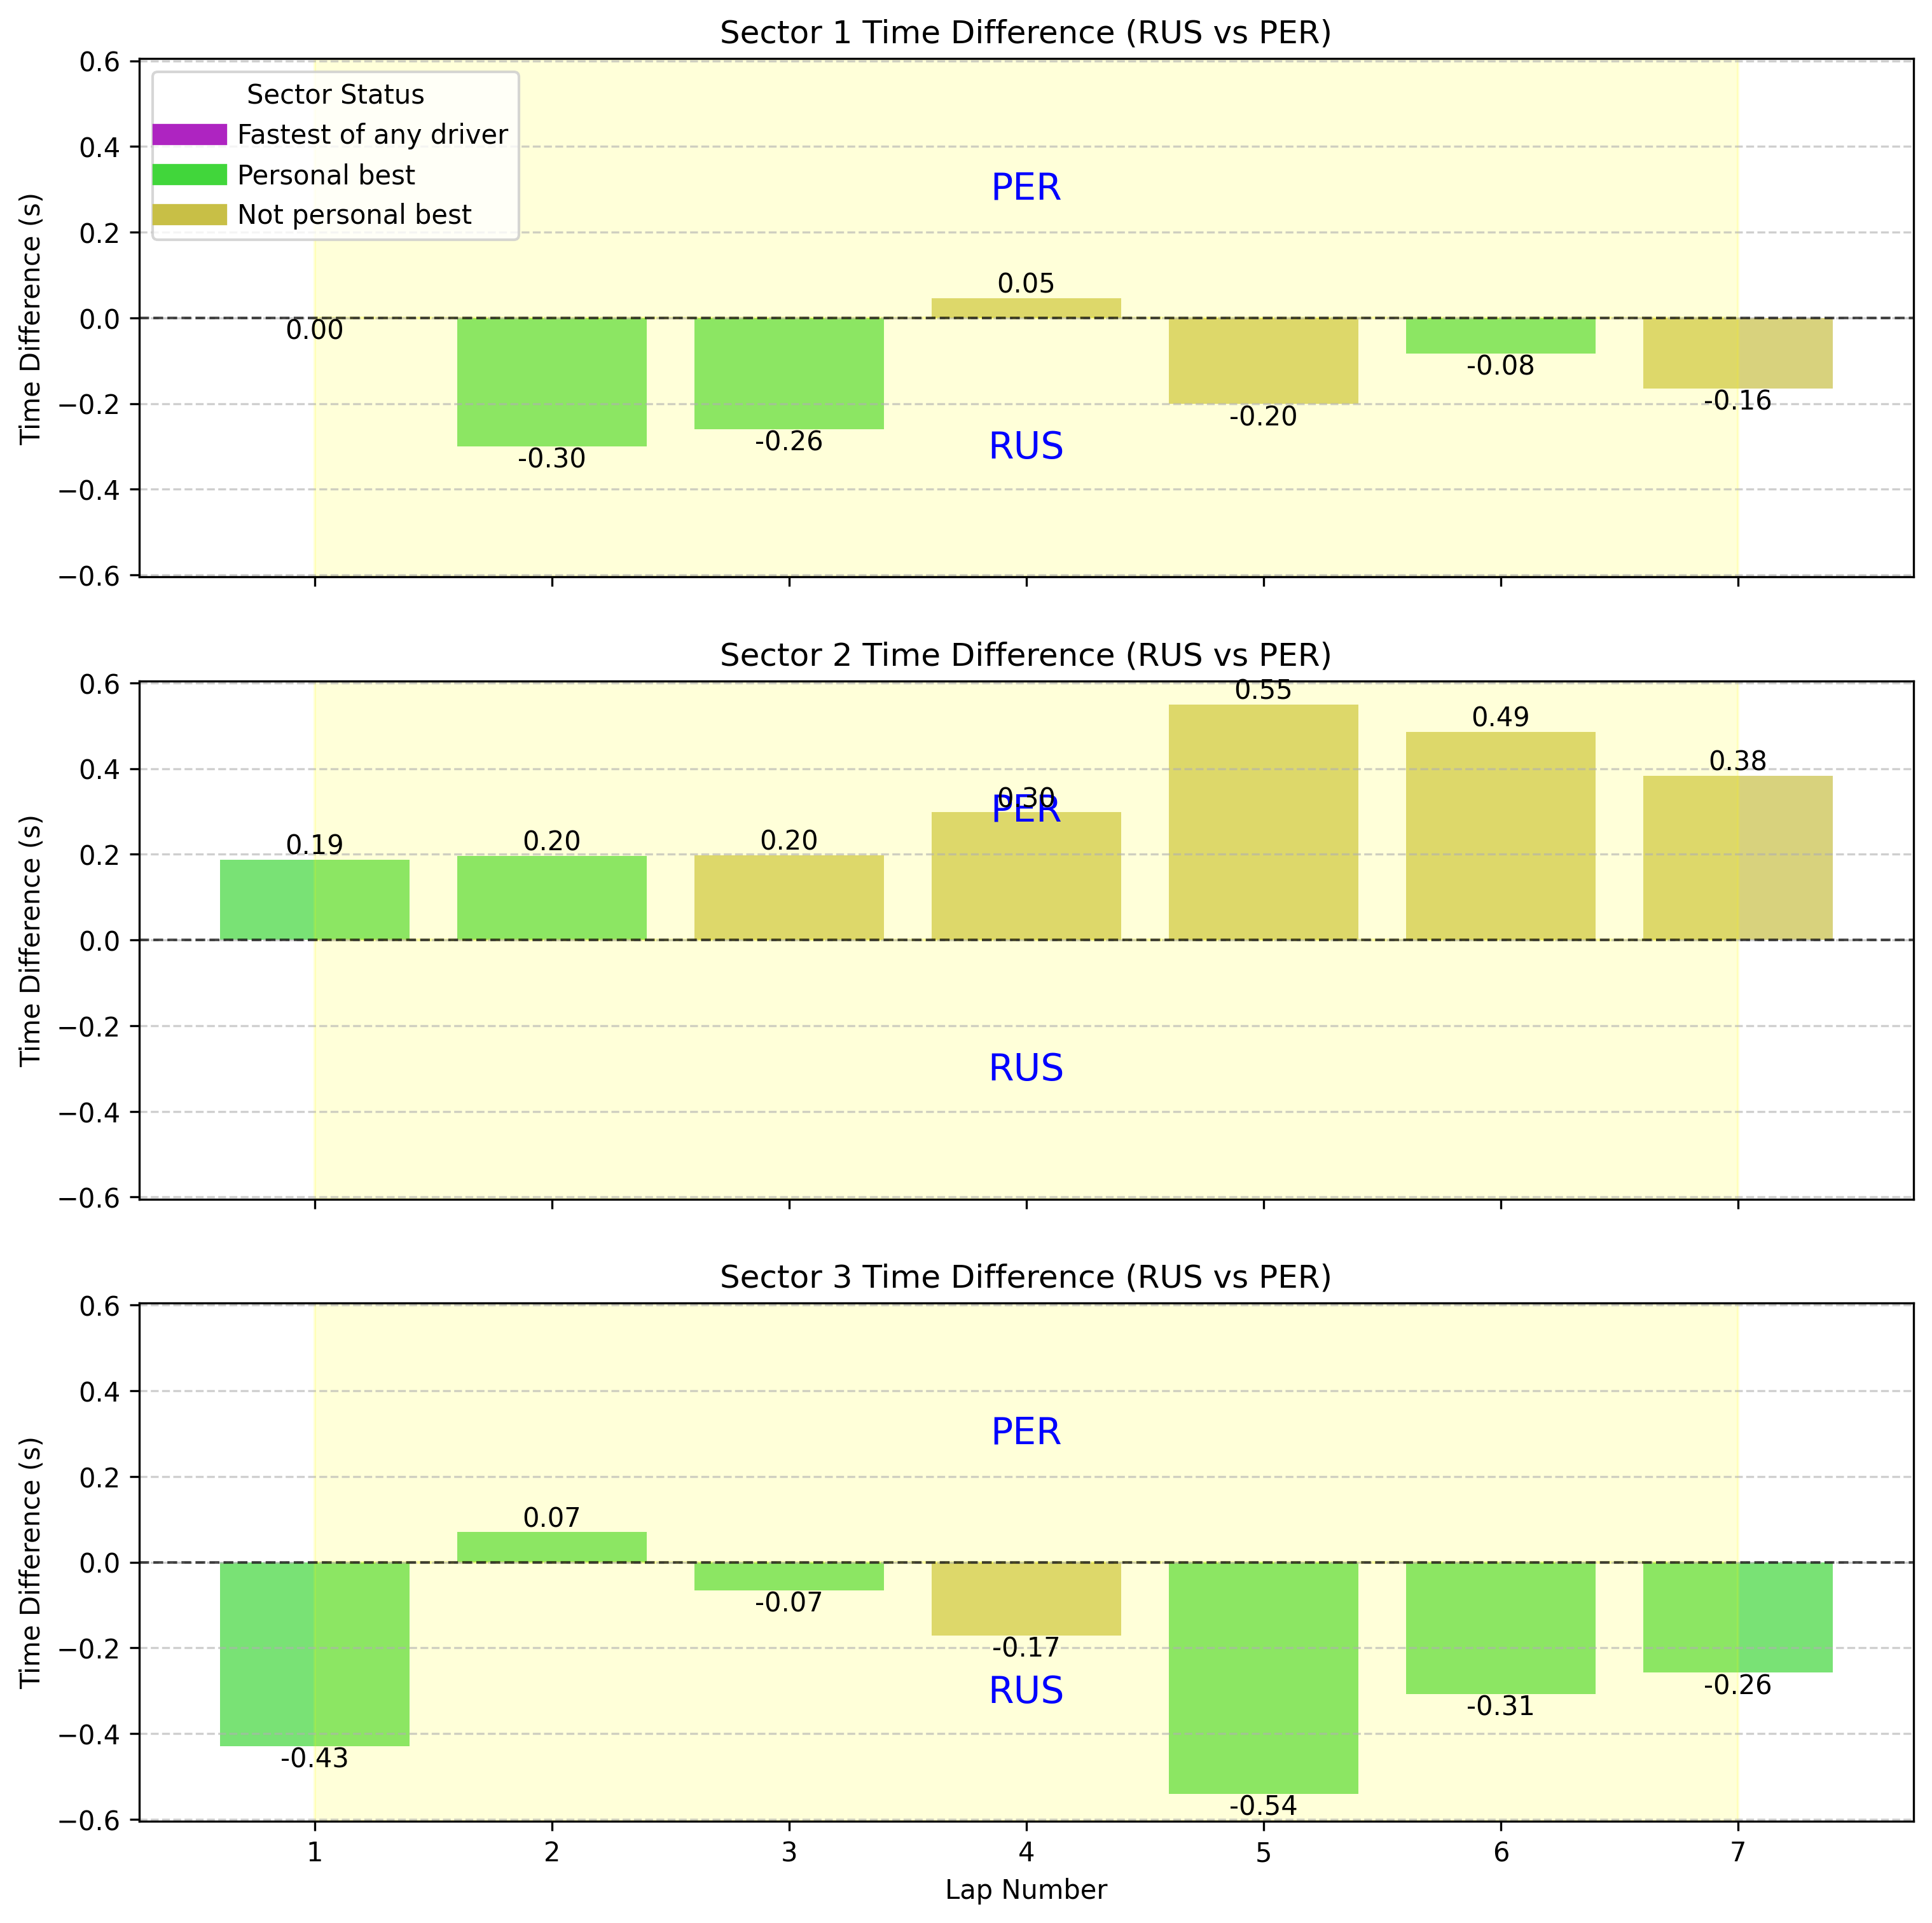 Sector-by-sector comparison between Russell and Perez
The DRS Power: Speed Advantage
Lap 5 speed comparison between Perez and Russell
Throughout their battle, Perez demonstrated just how much of a weapon DRS can be on a track like Albert Park. The speed differential between the two cars as can be seen below in the graph, was most pronounced between turns 8 and 9 and between turns 10 and 11, where Perez’s DRS activation allowed him to gain significantly on Russell.
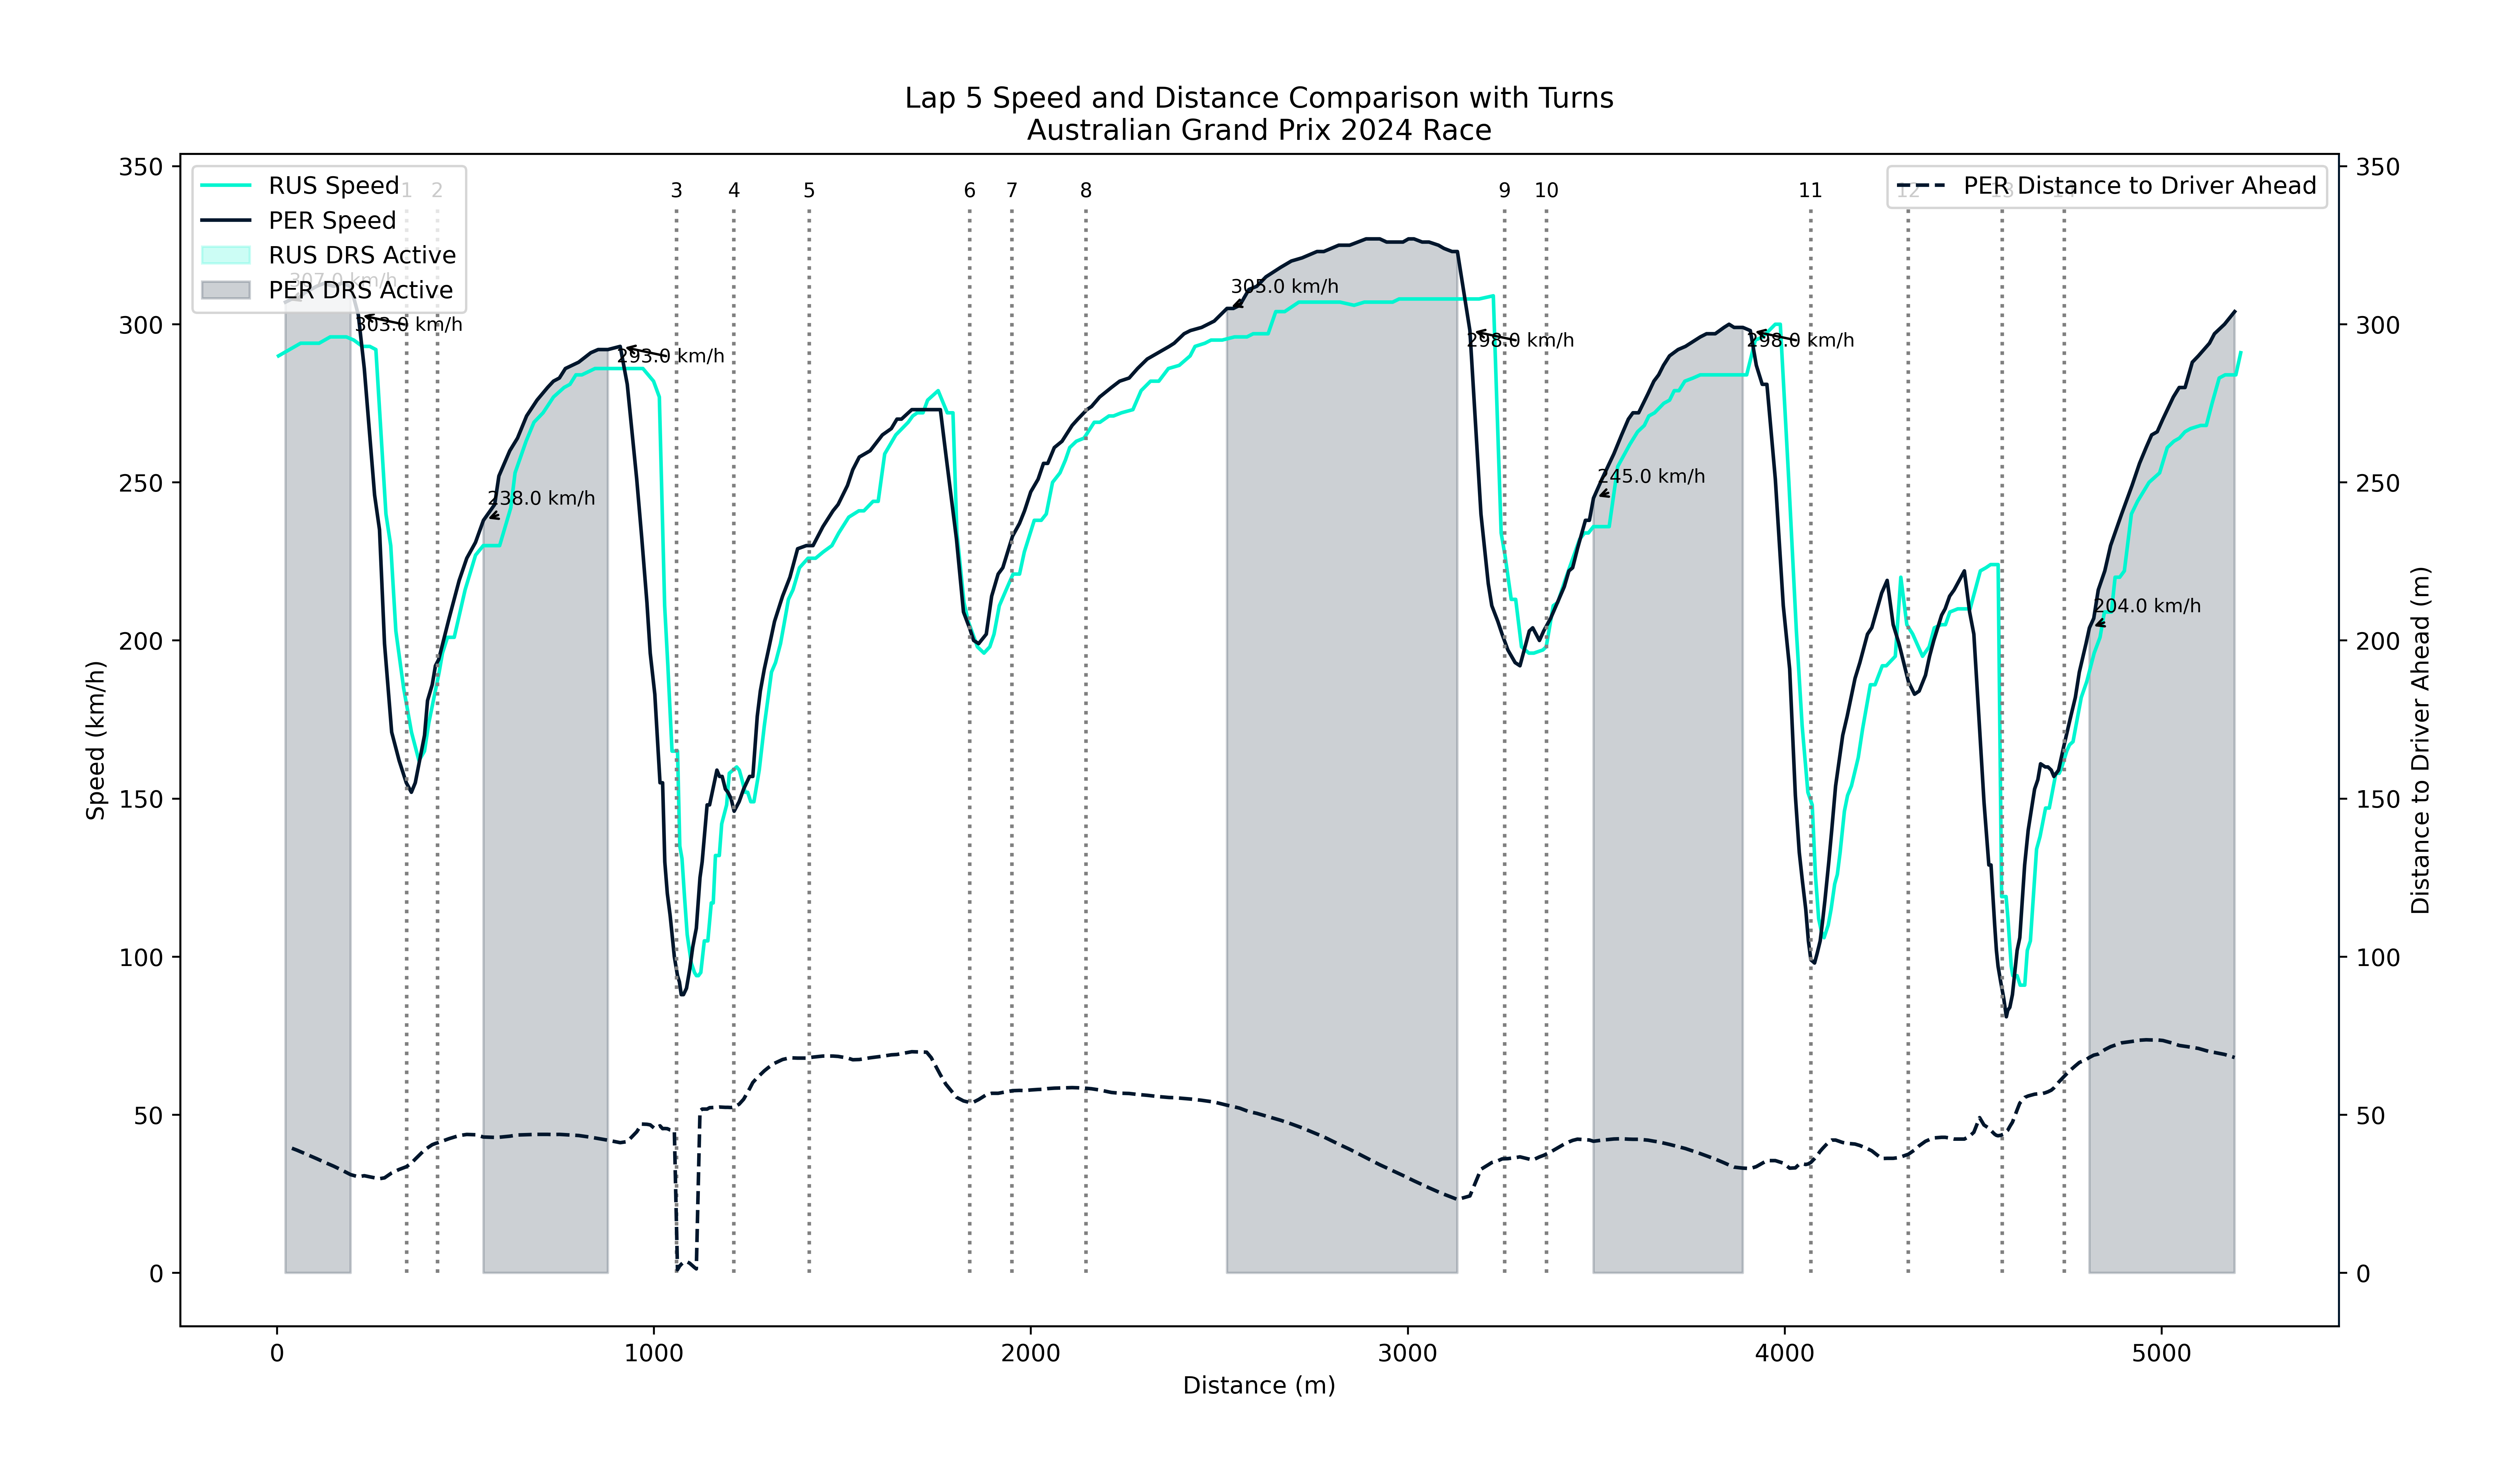 Lap 5 Speed Comparison Russell and Perez
 Lap 6 Speed Comparison Russell and Perez
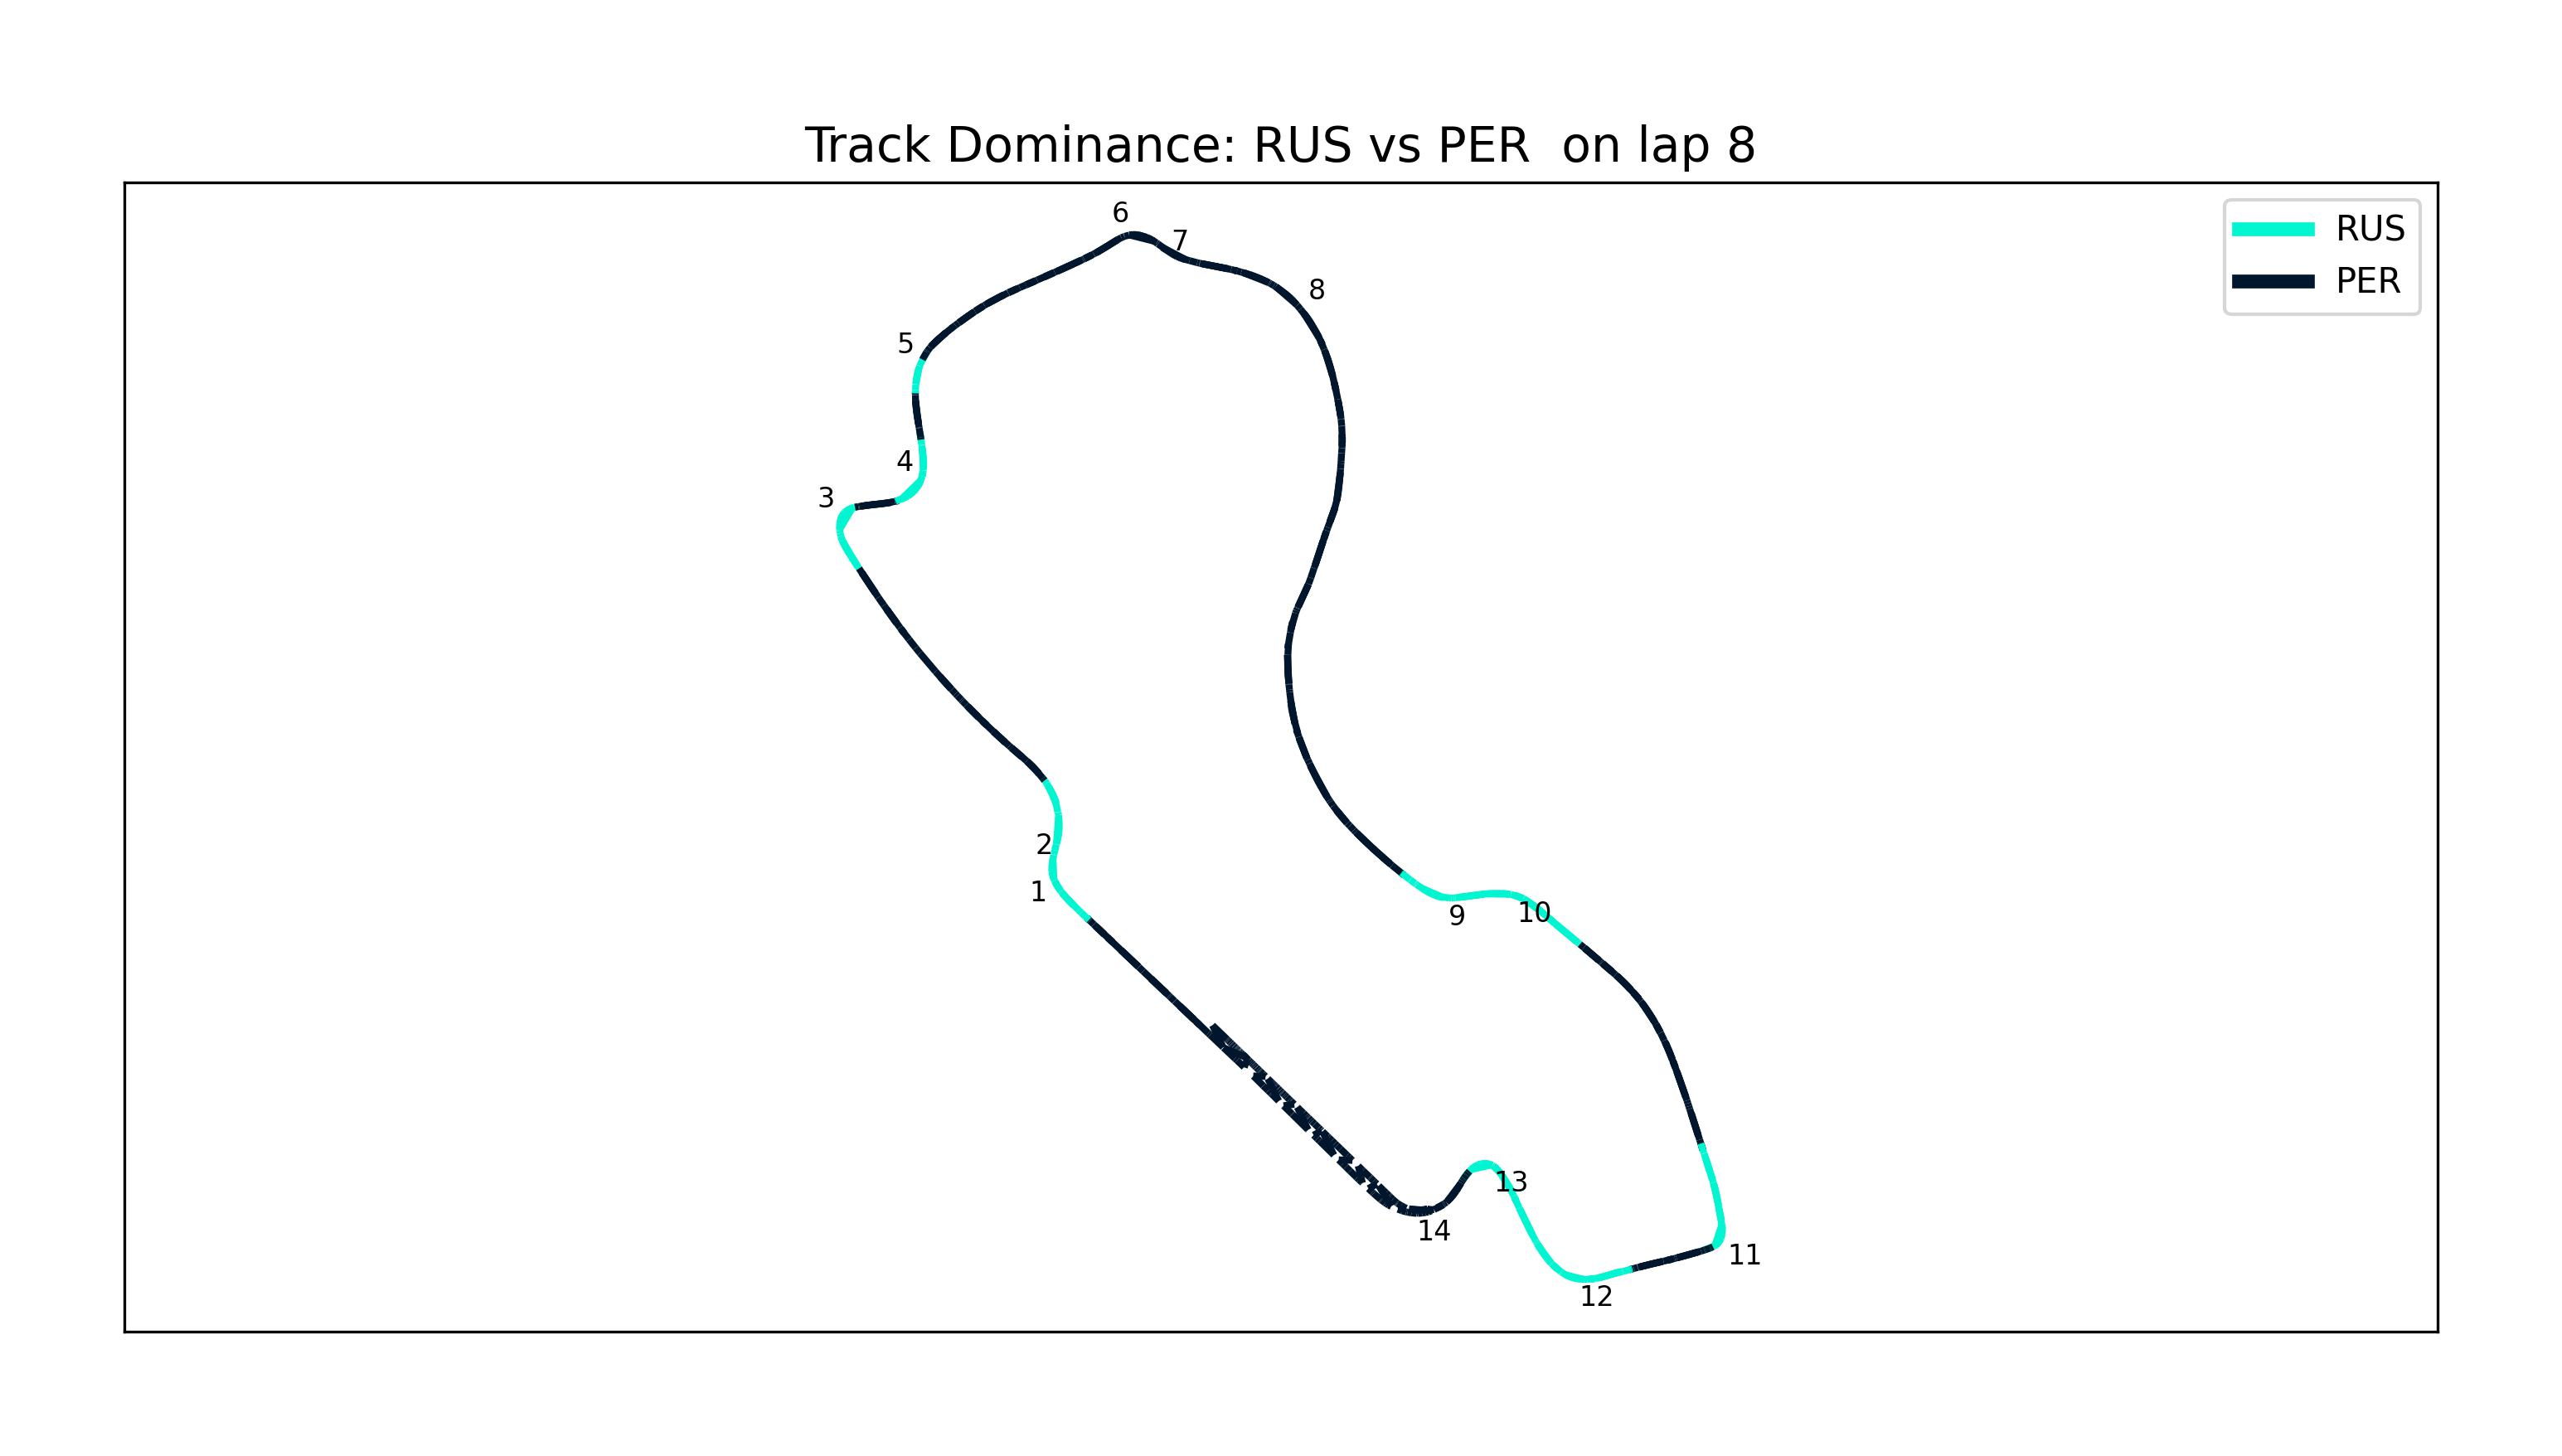 Lap 8 Track Dominance between Russell and Perez where the Red Bull reign supreme in high speed corners
Breakthrough and Free Air
Perez finally gained the upper hand when Russell pitted. With no obstacles in front of him, Perez unleashed the full potential of his Red Bull, setting a string of competitive laps as he chased down Piastri. The Red Bull’s dominance through high-speed corners and with DRS was unmistakable, reinforcing their advantage over much of the field.
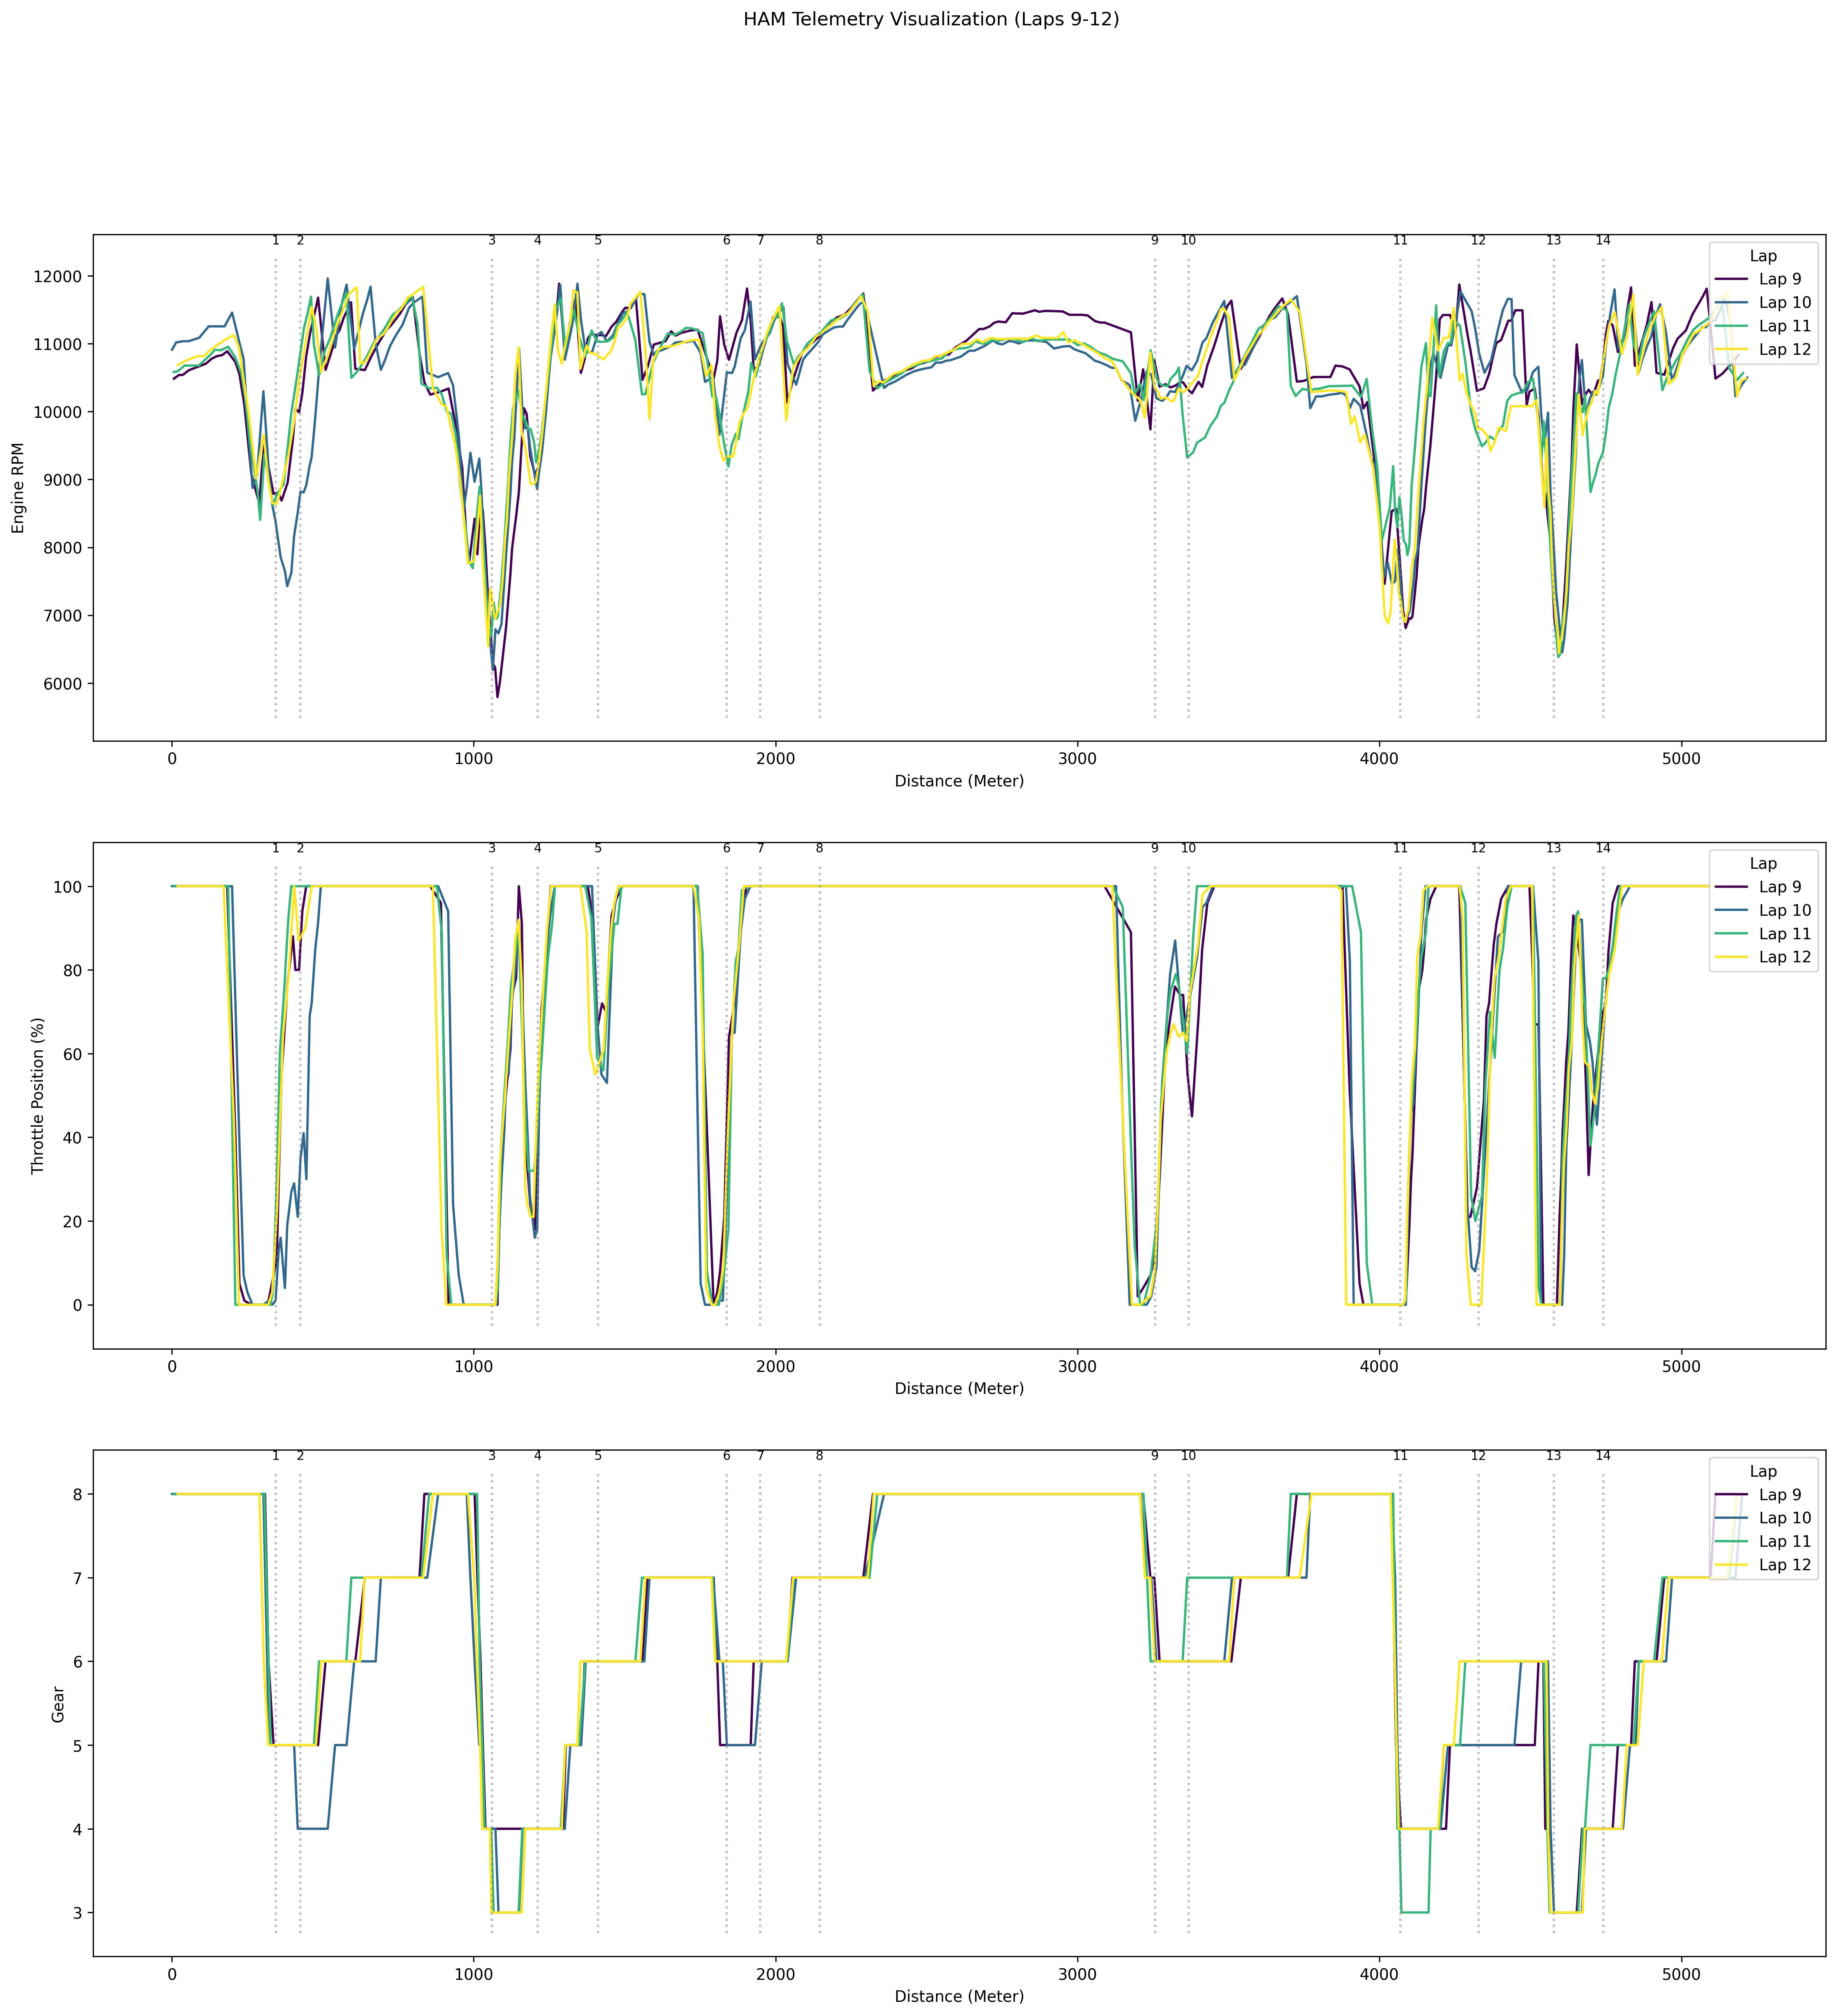
Telemetry Analysis: Hamilton vs Sainz
After years of dominance, Lewis Hamilton’s telemetry from this race hints at ongoing struggles with car balance and control. The comparison with Carlos Sainz’s data paints a stark contrast, suggesting that while Sainz was fully in control, Hamilton was battling his car throughout the race.
Sainz’s Consistency: A Driver in the Zone
Carlos Sainz’s engine RPM, throttle application, and gear changes were impressively stable lap after lap. This suggests that Sainz was in a rhythm, executing each corner with precision. His smooth inputs indicate a strong connection with the car, allowing him to extract performance without needing constant adjustments.
Key observations:
- Engine RPM: Minimal fluctuations through corners.
- Throttle: Consistent full-throttle application out of exits.
- Gears: Predictable shifts at optimal points.
This level of stability typically reflects confidence in the car’s handling and balance.
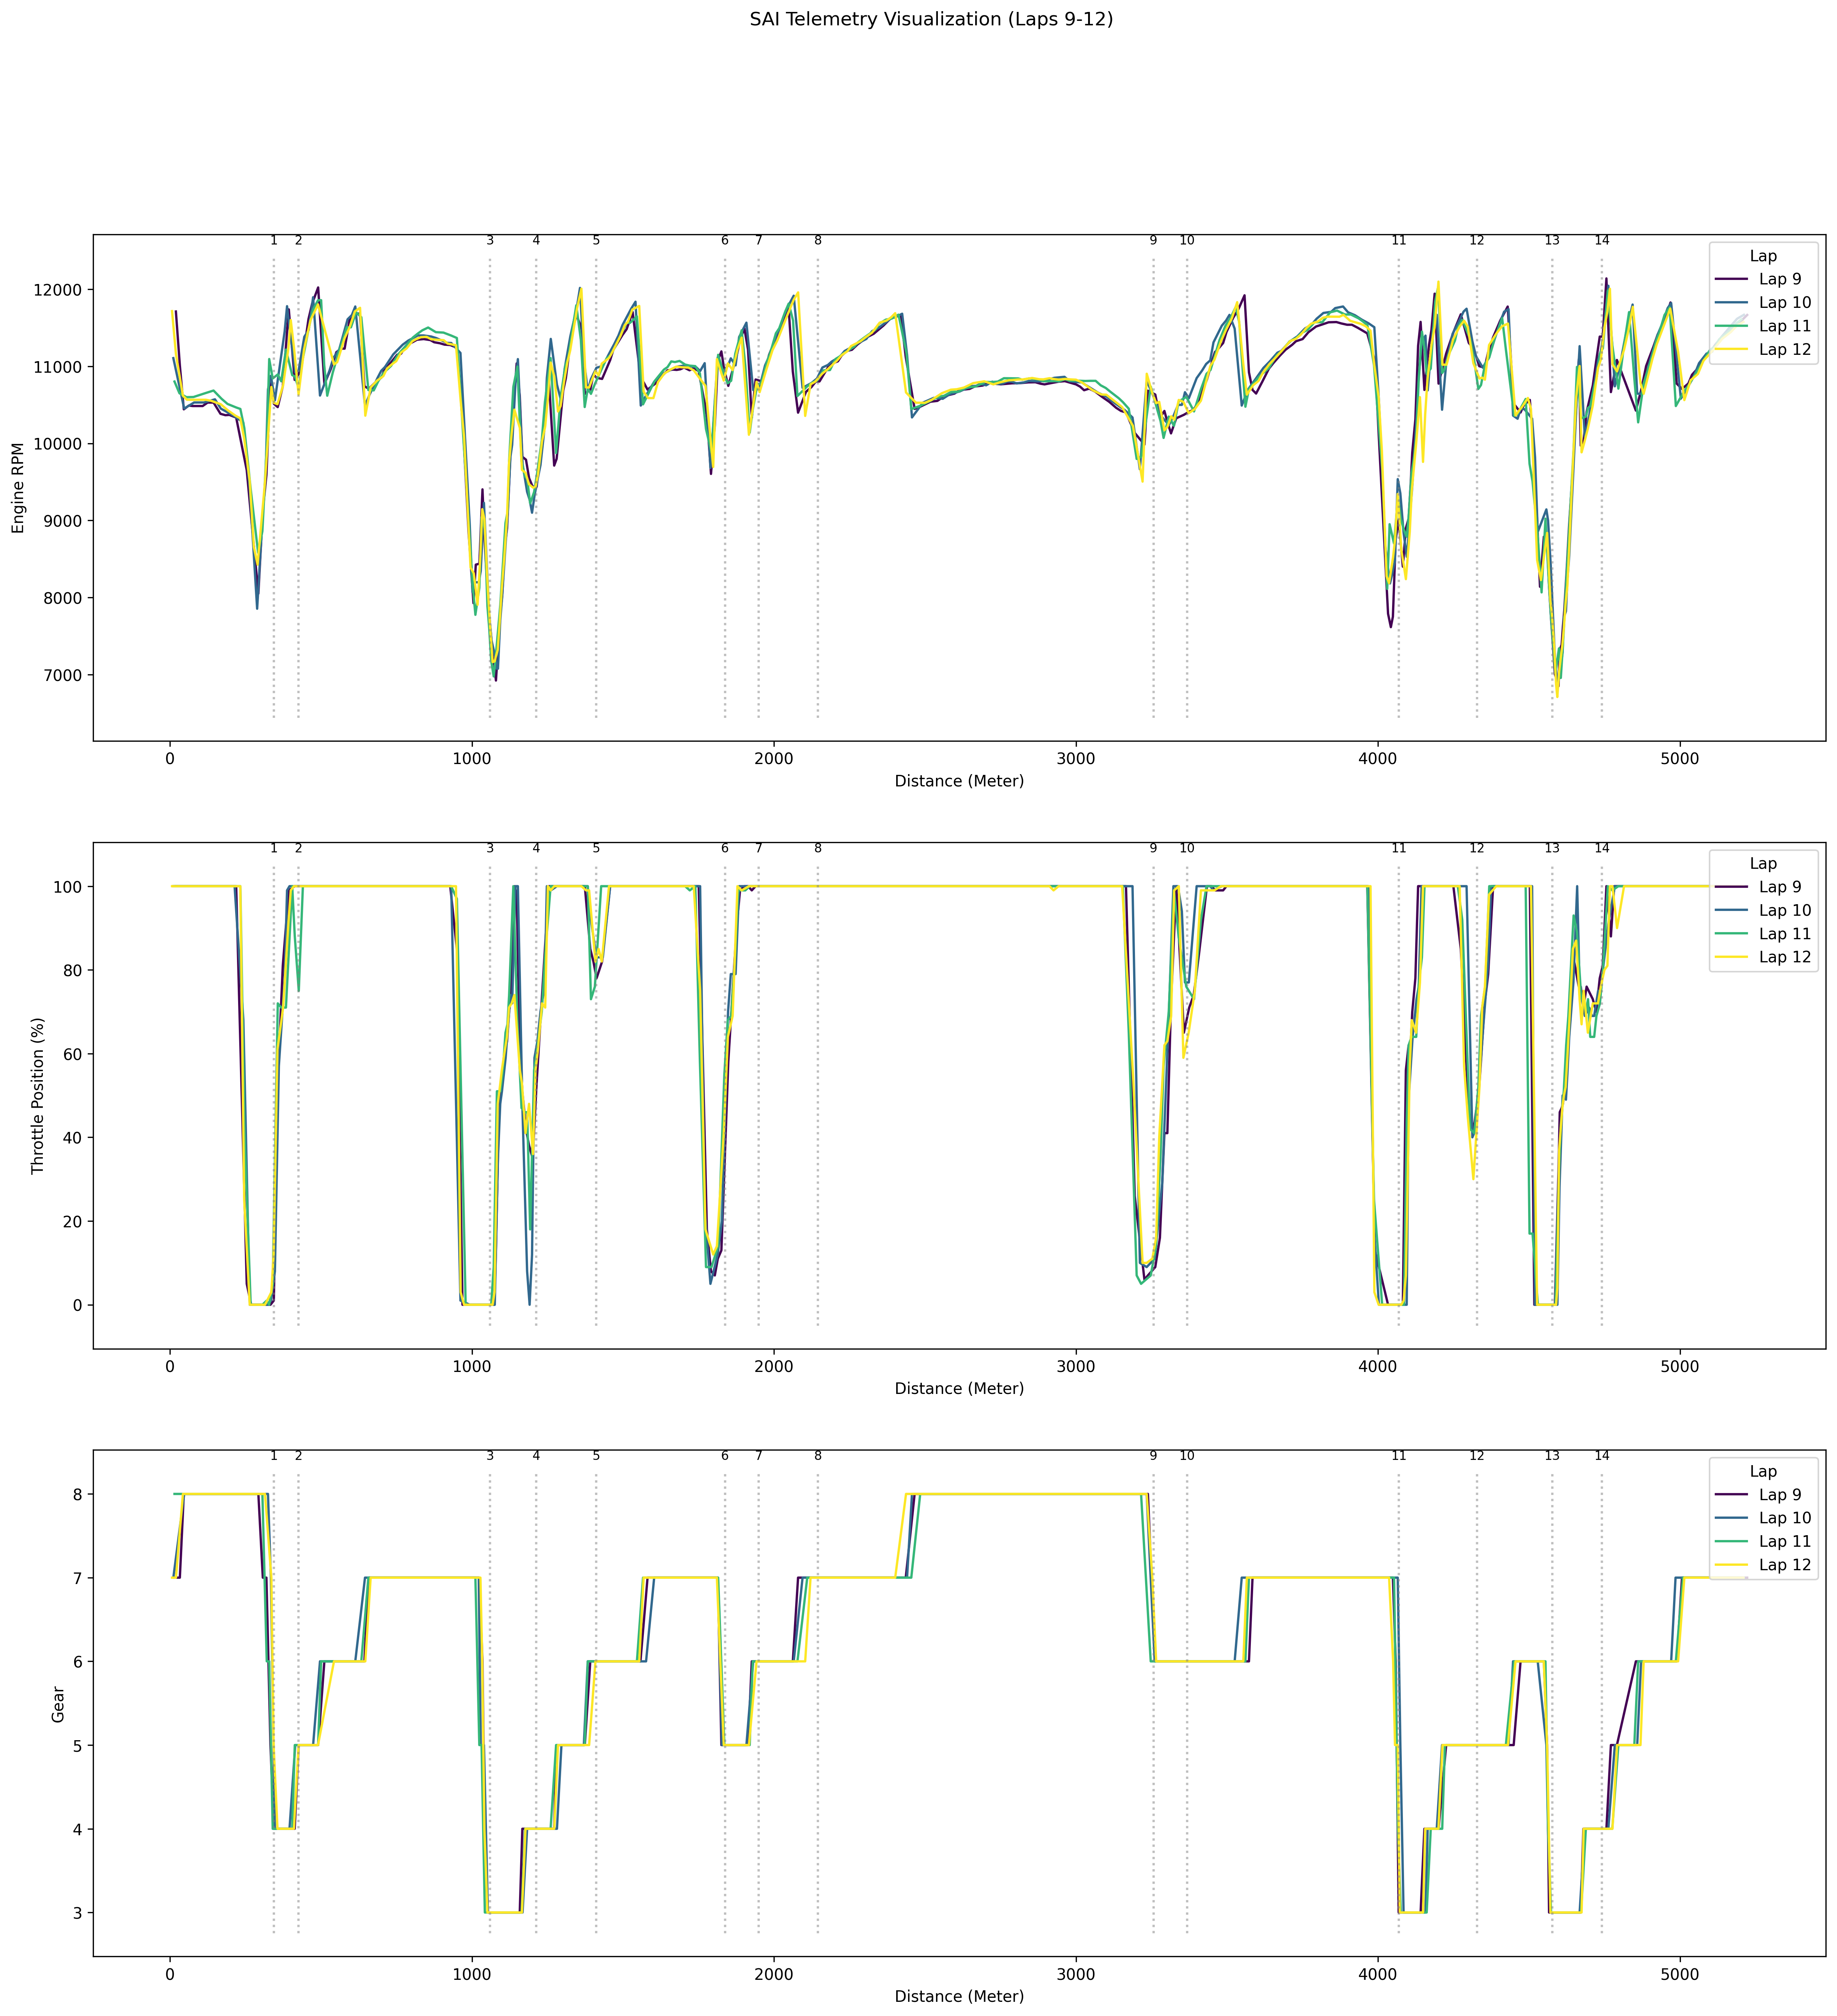
Hamilton’s Struggles: Fighting the Car
Hamilton’s telemetry, by contrast, reveals irregularities:
- Engine RPM: More frequent and pronounced fluctuations through corner sequences.
- Throttle: Hesitant application, particularly in high-speed sections, likely indicating understeer or traction concerns.
- Gears: Inconsistent shifts, suggesting he was either reacting to unexpected car behavior or adapting on the fly.
This could indicate a lack of trust in the car’s stability. The telemetry suggests Hamilton had to make repeated corrections, which would disrupt his rhythm and prevent him from optimizing lap times. In past seasons, his data likely displayed the same precision Sainz exhibited here—a hallmark of Hamilton’s mastery during Mercedes’ peak dominance.
The telemetry comparison underlines the challenges faced by Mercedes and Hamilton in 2024. Sainz, with a stable and balanced Ferrari, was able to perform consistently and effortlessly. Meanwhile, Hamilton’s inconsistent inputs suggest a deeper issue with car setup or performance—one that likely left him frustrated and unable to compete at the level he’s accustomed to.
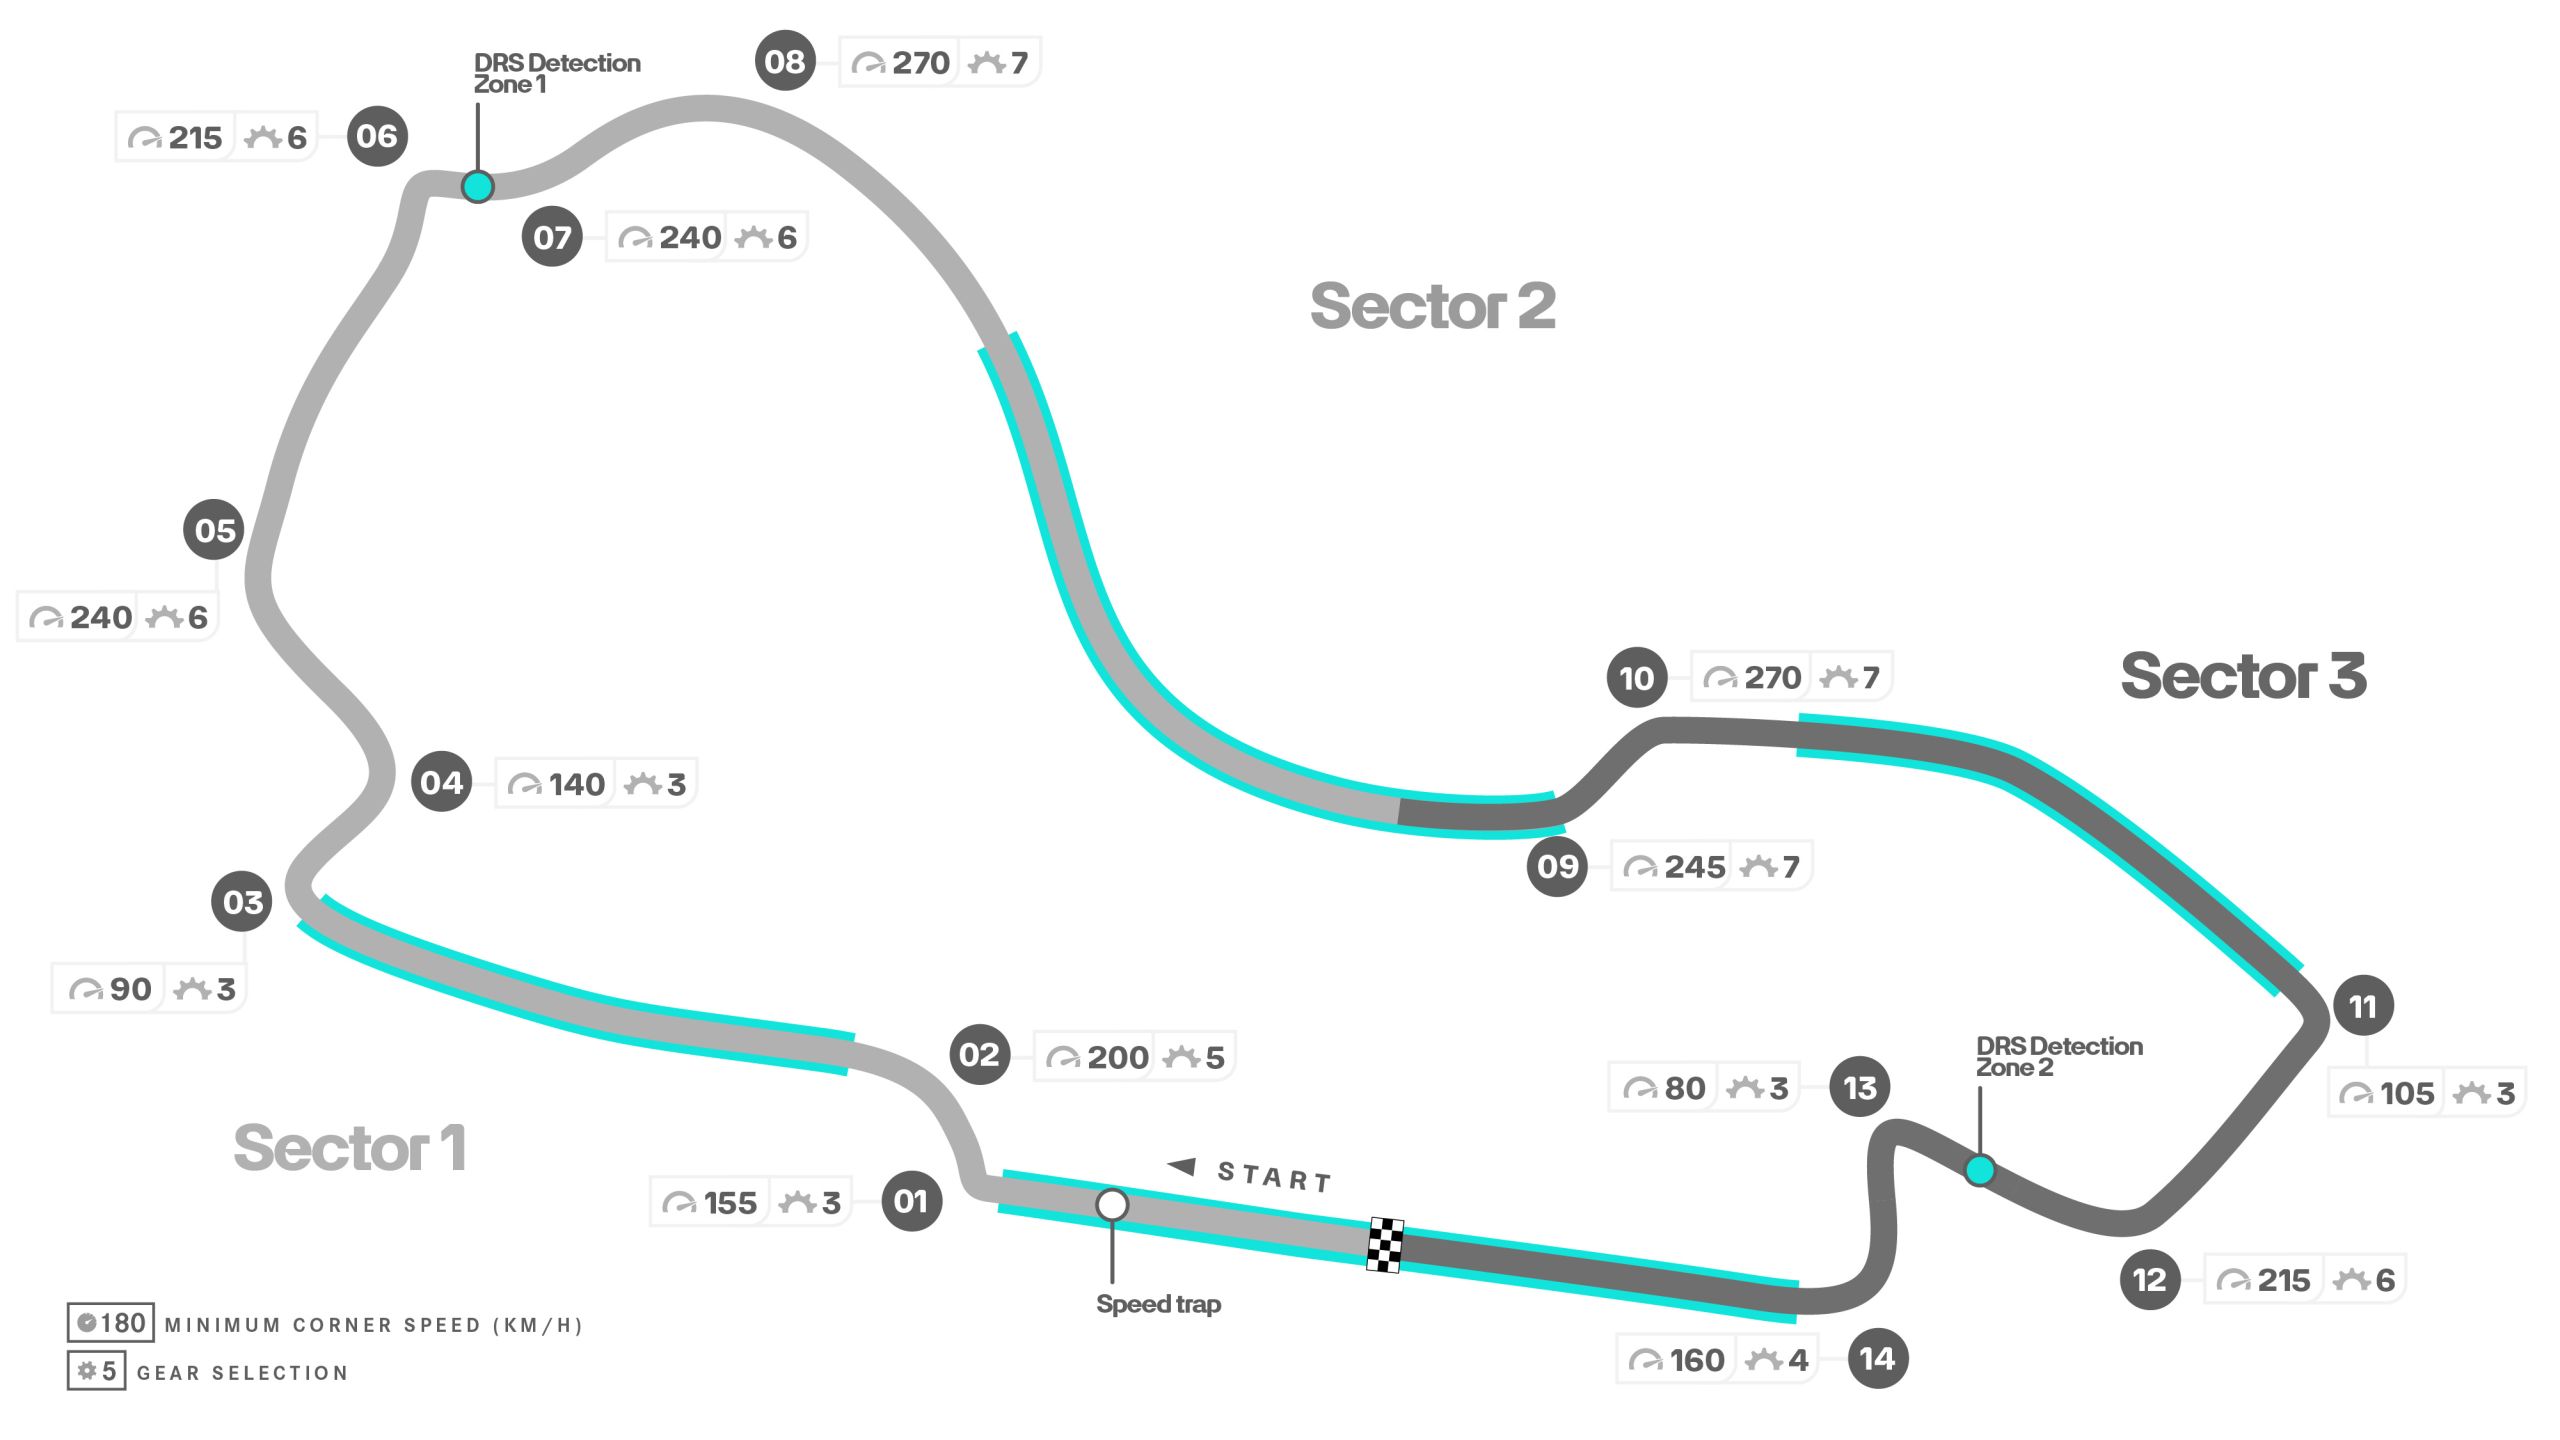
Albert Park Circuit
| Driver/Metric | Intermediate 1 (kph) | Intermediate 2 (kph) | Finish Line (kph) |
|---|---|---|---|
| Fastest Recorded | 288 (RUS, Hard, L52) | 336 (MAG,Hard, L42) | 311 (HUL, Hard, L40) |
| SAI | 277 (Hard, L48) | 298 (Hard, L48) | 291 (Hard, L48) |
| LEC | 287 (Hard, L56) | 325 (Hard, L56) | 294 (Hard, L56) |
Conclusion
The telemetry and performance data from the Australian Grand Prix tell two contrasting stories. Carlos Sainz, in a well-balanced Ferrari, demonstrated precision, consistency, and control.
In contrast, Lewis Hamilton’s data reveals a different reality. The inconsistent RPM and erratic gear shifts suggest that Hamilton was constantly fighting the car rather than being able to trust its behavior through corners. This likely contributed to the difficulty he faced in matching the pace of not just Red Bull and Ferrari, but even other mid-field threats. If the team fails to resolve these stability issues, Hamilton may continue to struggle, even as his skill and racecraft remain undeniable.
Meanwhile, Sainz’s resurgence and growing confidence may bolster Ferrari’s hopes for greater success this season—especially if he can consistently challenge the Red Bulls in future races. Whether this balance of power will shift as development races heat up remains to be seen. For now, the data reveals the current state of play: Red Bull remains the target, with Ferrari closing the gap, and Mercedes still looking for answers.
Data Sources and Methodology
All Formula 1 data points were obtained using the FastF1 API, an open-source Python library for processing Formula 1 telemetry and timing data. Data analysis and visualizations were performed using Python, leveraging:
- Pandas for data manipulation and cleaning.
- Matplotlib and Seaborn (sns) for creating detailed visualizations.